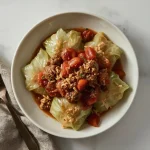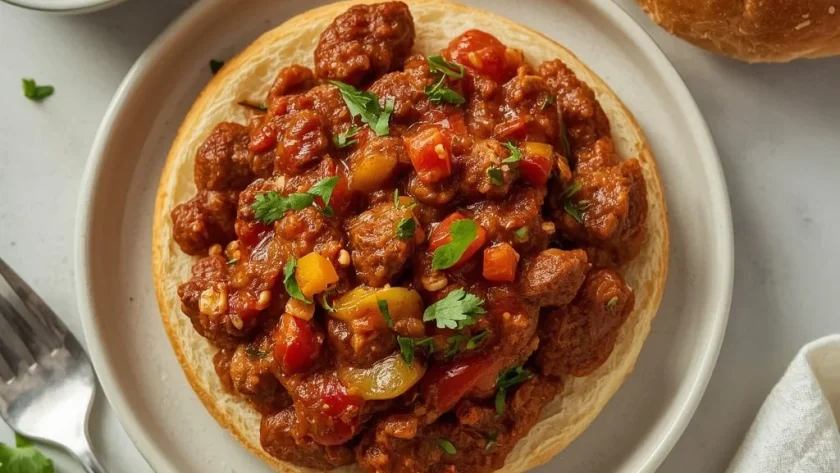
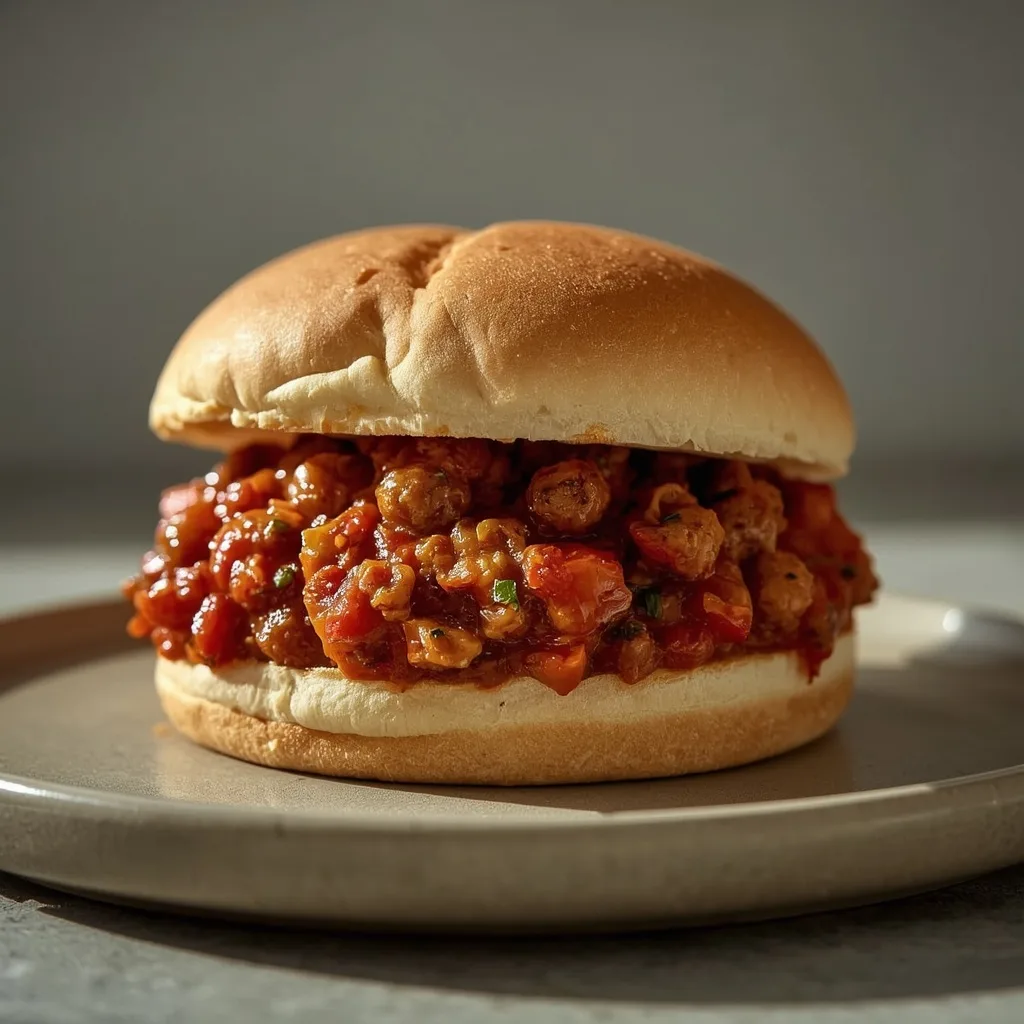
Pioneer Woman Italian Sloppy Joes
Pioneer Woman Italian Sloppy Joes take the classic childhood sandwich and give it a savory, herb‑packed Italian makeover. Using lean turkey Italian sausage instead of ground beef keeps the filling lighter while delivering big, bold flavor from oregano, basil, and a touch of tomato paste.
This recipe comes together in just 30 minutes, making it a perfect weeknight dinner that pleases both kids and adults. The mixture of tender bell peppers, onions, and simmered sausage piled onto toasted buns creates a satisfying meal that feels a little more grown‑up than the original.
What are Pioneer Woman Italian Sloppy Joes?
They are a stovetop sandwich filling made with ground turkey Italian sausage, tomato sauce, and a handful of aromatic vegetables. The sausage is browned first, then simmered with onions, green bell peppers, garlic, dried oregano, and dried basil until the sauce thickens and the flavors meld. The result is a saucy, slightly sweet (thanks to a pinch of sugar), and deeply savory mixture that’s spooned onto soft toasted buns.
Why You’ll Love This Recipe
- Quick cooking time — From start to finish, you’re looking at about 30 minutes. That’s faster than takeout.
- Lighter than traditional sloppy joes — Using turkey or chicken sausage cuts the fat while keeping the meaty texture and flavor.
- Pantry‑friendly ingredients — Most of what you need (tomato sauce, dried herbs, onion, garlic) are staples you likely already have.
- Crowd‑pleasing for all ages — The familiar sloppy joe format makes it approachable, but the Italian twist feels fresh and exciting.
- Freezer‑friendly filling — Make a double batch and freeze half for a busy night. The filling holds up beautifully.
- Easy to customize — Swap the protein, add cheese, or pile on extra veggies. The base is forgiving.
Essential Ingredients for Pioneer Woman Italian Sloppy Joes
Here is what you need to make this dish shine. I’ve noted a few quality tips and easy swaps.
- Ground turkey Italian sausage (1 lb) — Look for lean sausage (around 85/15) to avoid excess grease. If you find links, remove the casings before cooking. The Italian seasoning in the sausage does double duty here.
- Olive oil (1 tbsp) — A light‑flavored olive oil works fine. You only need a small amount to start browning the meat.
- Yellow onion (½ cup finely diced) — About half a medium onion. Dicing it small helps it cook quickly and blend into the sauce.
- Green bell pepper (½ cup finely diced) — Half a medium pepper. Dice it the same size as the onion so they soften evenly.
- Garlic (2 cloves, minced) — Fresh garlic matters here. Pre‑minced jarred garlic can be used in a pinch, but fresh gives brighter flavor.
- Tomato sauce (8 oz can) — One small can. No need for seasoned sauce; you will add your own herbs.
- Tomato paste (1 tbsp) — This deepens the tomato flavor and helps thicken the sauce.
- Dried oregano (½ tsp) — Classic Italian herb. If you have fresh, use about 1½ teaspoons.
- Dried basil (½ tsp) — Adds a sweet, peppery note. Fresh basil at the end is a nice garnish.
- Granulated sugar (1 tsp, optional) — A tiny pinch balances the acidity of the tomatoes. Leave it out if your sauce tastes just right.
- Kosher salt (½ tsp) — I prefer kosher because it dissolves evenly. Adjust to taste at the end.
- Black pepper (¼ tsp) — Freshly ground gives more pop, but pre‑ground works.
- Hamburger buns (4, split and lightly toasted) — Choose sturdy buns that hold up to the saucy filling. Toast them to prevent sogginess.
Equipment You’ll Need
- Large skillet or Dutch oven — A 12‑inch skillet gives enough surface area to brown the meat without overcrowding. A Dutch oven works too and holds heat well.
- Wooden spoon or spatula — For breaking the sausage into small crumbles as it cooks.
- Slotted spoon — Helps you transfer the browned sausage to a plate while leaving the flavorful drippings behind.
- Cutting board and chef’s knife — For dicing the onion, bell pepper, and mincing the garlic. A sharp knife makes the prep faster and safer.
- Baking sheet (optional for broiling buns) — If you want to toast buns under the broiler, a rimmed baking sheet works perfectly.
Instructions to Make Pioneer Woman Italian Sloppy Joes
The method is straightforward, but a few details matter. Follow these steps closely for the best texture and flavor.
- Brown the sausage — Heat olive oil in a large skillet over medium‑high until it shimmers. Add the ground turkey Italian sausage and cook, breaking it apart, until browned and cooked through — about 6‑8 minutes. Use a slotted spoon to transfer the meat to a plate, leaving about 1 tablespoon of drippings in the pan.
- Sauté the vegetables — Reduce heat to medium. Add diced onion and bell pepper. Cook, stirring occasionally, until softened — about 4‑5 minutes. The onion should become translucent and the pepper just tender. Add the minced garlic and stir for 30 seconds until fragrant. Do not let the garlic burn.
- Combine and simmer — Return the cooked sausage to the skillet. Add tomato sauce, tomato paste, oregano, basil, sugar (if using), salt, and pepper. Stir until everything is well combined and the tomato paste is fully incorporated.
- Simmer uncovered — Bring the mixture to a gentle simmer over medium heat (small bubbles breaking the surface). Reduce heat to medium‑low and let it cook uncovered for 8‑10 minutes, stirring occasionally. The sauce should thicken slightly and the flavors meld. It should be moist but not watery.
- Toast the buns — While the filling simmers, toast the buns. Broil cut‑side up on a baking sheet for 1‑2 minutes (watch closely) or toast in a dry skillet over medium heat for 1 minute. Toasting prevents the buns from getting soggy.
- Assemble and serve — Spoon about ½ cup of the hot filling onto the bottom half of each bun. Top with the other half and serve immediately. Add grated Parmesan or provolone if desired.

Common Mistakes I Made (And How I Fixed Them)
- Not draining enough fat — Even with lean turkey sausage, there can be excess drippings. I learned to leave only about 1 tablespoon; more makes the filling greasy. If there’s more, pour it off before adding the vegetables.
- Skipping the garlic timing — I used to add garlic with the onions and peppers. It burned every time. Now I add it only after the vegetables are soft, and I stir for just 30 seconds. Game changer.
- Overcrowding the pan — When I tried to cook the sausage on too high heat without breaking it up enough, some pieces stayed pale. Now I break the meat into small pieces early and give it space to brown properly.
- Not simmering long enough — The first few times, I rushed the simmer. The sauce was thin and the flavors tasted separate. Letting it go a full 8‑10 minutes (or even 12 if needed) makes a huge difference.
- Forgetting to toast the buns — Soft buns can turn into a soggy mess with this saucy filling. I now always toast them, and the extra minute is worth it for the texture contrast.
Best Tips for Pioneer Woman Italian Sloppy Joes Success
- Dice the vegetables uniformly — Small, even pieces cook at the same rate and distribute evenly throughout the filling. Take an extra 30 seconds to make them all the same size.
- Use a heavy pan for even browning — A cast‑iron or heavy stainless skillet holds steady heat. Thin pans can cause hot spots that burn the meat unevenly.
- Taste and adjust seasoning at the end — The saltiness of sausage varies by brand. After simmering, taste the filling and add a pinch more salt or pepper if needed.
- Let the filling rest off the heat for a minute — This allows the sauce to settle and thicken slightly more. It also prevents steam burns when you spoon it onto the buns.
- Warm the buns before assembling — A warm bun keeps the filling hot longer. If you broil or skillet‑toast them, do it just before serving.
- Double the recipe for meal prep — The filling freezes beautifully, so consider making a larger batch. It’s just as easy to cook 2 pounds as 1.
Best Ingredient Swaps for Pioneer Woman Italian Sloppy Joes
- Turkey sausage for chicken sausage — You can use ground chicken Italian sausage instead. The flavor is similar, and the texture is slightly leaner.
- Green bell pepper for red or orange — Any bell pepper works. Red adds a touch of sweetness; green gives a sharper, more peppery kick.
- Dried herbs for fresh — Use 1½ teaspoons fresh oregano or fresh basil instead of the dried. Add fresh basil at the very end for brightness.
- Tomato sauce for crushed tomatoes — If you don’t have a can of sauce, 8 ounces of crushed tomatoes with a little extra simmering time works perfectly.
- Hamburger buns for crusty rolls — Ciabatta rolls or kaiser rolls hold up even better. Split and toast them the same way.
Delicious Variations to Try
- Cheesy Italian Sloppy Joes — Sprinkle shredded mozzarella or provolone over the filling during the last minute of simmering. Let it melt before spooning onto buns.
- Spicy Italian version — Use hot Italian sausage instead of mild. Add a pinch of red pepper flakes with the garlic for extra heat.
- Stuffed peppers twist — Spoon the filling into halved and seeded bell peppers. Top with cheese and bake at 375°F for 20 minutes.
- Pasta bowl option — Serve the filling over cooked spaghetti or rigatoni instead of on a bun. Sprinkle with Parmesan and fresh basil for an easy Italian pasta dish.
- Zucchini boat variation — Halve medium zucchini, scoop out the centers, and fill with the sloppy joe mixture. Bake at 375°F for 15‑20 minutes for a low‑carb dinner.
How to Store Leftovers Properly
- Refrigerator storage — Transfer cooled filling to an airtight container. Store for up to 4 days. Keep buns separately at room temperature in a bread bag.
- Freezer storage — Cool the filling completely, then transfer to a freezer‑safe container or zip‑top bag. Flatten the bag for even freezing. Freeze for up to 3 months.
- Thawing before reheating — Move the frozen filling to the refrigerator overnight. Reheat as usual the next day. Avoid microwaving from frozen, as it can become watery.
How to Reheat Pioneer Woman Italian Sloppy Joes
Leftover filling reheats beautifully. Here are the best methods, depending on your preference.
- Stovetop method — Place the filling in a small skillet over medium‑low heat. Add a splash of water or extra tomato sauce if it seems dry. Stir occasionally until hot throughout, about 5 minutes.
- Microwave method — Spoon the filling into a microwave‑safe bowl. Cover loosely with a damp paper towel and microwave in 30‑second bursts, stirring between each, until steaming. Usually about 1½ minutes total.
- Oven method — Preheat oven to 350°F. Spread the filling in an oven‑safe dish, cover with foil, and bake for 15‑20 minutes until hot. This is great if you are reheating a larger batch.
Nutritional Breakdown (Per Serving)
Each serving is based on one sandwich (½ cup filling on one bun). Values are approximate.
- Calories: 383
- Protein: 23g
- Fat: 20g
- Carbohydrates: 30g
- Fiber: 2g
- Sugar: 5g
- Sodium: about 1540mg
- Cholesterol: roughly 70mg (based on turkey sausage)
FAQs
Can I freeze Pioneer Woman Italian Sloppy Joes?
Yes, the filling freezes well for up to 3 months. Cool it completely, then store in a freezer‑safe bag or container. Thaw overnight in the fridge before reheating.
What can I serve with these sloppy joes?
A simple side salad or roasted potatoes balances the richness. I also love them with coleslaw or a handful of potato chips for crunch.
Can I make Pioneer Woman Italian Sloppy Joes ahead of time?
Absolutely. Prepare the filling up to two days in advance and keep it refrigerated. Reheat on the stovetop and toast the buns just before serving.
How do I prevent the buns from getting soggy?
Toasting the buns is key. You can also spread a thin layer of butter on the cut sides before toasting for extra protection and flavor.
Is this recipe gluten‑free?
The filling itself is gluten‑free (all ingredients are naturally gluten‑free). To keep the whole dish gluten‑free, serve the filling over rice, quinoa, or use gluten‑free buns.
Can I use ground beef instead of turkey sausage?
You can, but the Italian seasoning won’t come through as strongly. If using plain ground beef, add a teaspoon of fennel seeds and an extra pinch of oregano and basil to mimic Italian sausage flavor.
Try These Recipes
- Pioneer Woman Italian Cookies
- Pioneer Woman Slow Cooker Pinto Beans
- Pioneer Woman Mexican Wedding Cookies
- Pioneer Woman Sugar Cookie Fudge
Final Words
Pioneer Woman Italian Sloppy Joes deliver all the comfort of the classic with a fresh, herb‑forward profile that feels just right for busy weeknights. The filling is quick, flexible, and freezes like a dream. Give this recipe a try — I think you will find yourself making it on repeat.
Pioneer Woman Italian Sloppy Joes
A hearty, saucy twist on classic sloppy joes using lean turkey Italian sausage, bell peppers, and aromatic herbs. The filling simmers until thick and savory, then gets piled onto soft hamburger buns for a quick, crowd-pleasing weeknight dinner.
SAVE THIS RECIPE!
Get this sent to your inbox, plus get new recipes from us every week!
INGREDIENTS
INSTRUCTIONS
-
1
Heat the olive oil in a large skillet or Dutch oven over medium-high heat until the oil shimmers. Add the ground turkey Italian sausage and cook, breaking it apart with a wooden spoon, until browned and cooked through, about 6-8 minutes. Use a slotted spoon to transfer the sausage to a plate; leave about 1 tablespoon of drippings in the pan (discard excess).nReduce the heat to medium. Add the diced onion and bell pepper to the pan. Cook, stirring occasionally, until the vegetables soften, about 4-5 minutes. The onion should become translucent and the pepper just tender. Add the minced garlic and cook for 30 seconds until fragrant, stirring constantly to prevent burning.nReturn the cooked sausage to the skillet. Add the tomato sauce, tomato paste, dried oregano, dried basil, sugar (if using), kosher salt, and black pepper. Stir everything together until the tomato paste is fully incorporated and the sauce is evenly distributed.nBring the mixture to a gentle simmer over medium heat (you should see small bubbles breaking the surface). Reduce the heat to medium-low and let it cook uncovered for 8-10 minutes, stirring occasionally, until the sauce has thickened slightly and the flavors meld. The filling should be moist but not watery.nWhile the filling simmers, toast the hamburger buns if desired: place split buns on a baking sheet and broil on high for 1-2 minutes, watching closely, until the cut sides are golden. Alternatively, heat a dry skillet over medium heat and place buns cut-side down for 1 minute until lightly browned.nTo serve, spoon about 1/2 cup of the hot filling onto the bottom half of each bun. Top with the other half of the bun and serve immediately. Optionally, garnish with grated Parmesan or provolone cheese and additional fresh basil (not included in nutrition).
NOTES
- Store leftover filling in an airtight container in the refrigerator for up to 4 days. To freeze, cool the filling completely, then transfer to a freezer-safe container or bag and freeze for up to 3 months. Thaw overnight in the fridge before reheating. Reheat filling on the stovetop over medium-low heat, adding a splash of water or tomato sauce if it seems dry, or microwave in 30-second bursts until hot. Buns are best toasted fresh; store them separately.
NUTRITION
Serving: 1 | Calories: 383kcal | Carbohydrates: 30g | Protein: 23g | Fat: 20g | Saturated Fat: 5.5g | Cholesterol: 100mg | Sodium: 1540mg | Fiber: 2g | Sugar: 5g
Nutrition information is automatically calculated, so should only be used as an approximation.