

Pioneer Woman Ice Cream Cake Recipe

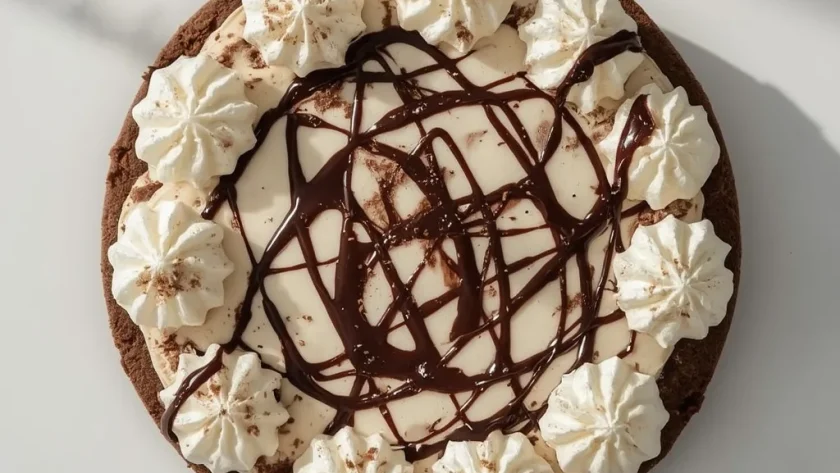
The Pioneer Woman Ice Cream Cake is exactly the kind of dessert that looks fancy but takes almost no real effort. Layers of vanilla and chocolate ice cream sit on a chocolate cookie crust, with a ribbon of warm hot fudge running through the middle. A soft whipped cream topping finishes it off, making every bite creamy, crunchy, and cold in all the right ways.
This no-bake treat works for birthdays, summer cookouts, or any time you want something impressive without turning on the oven. The total time runs about 4 hours 30 minutes, but you only spend about 30 minutes actively working — the freezer does the rest. Since it is an American dessert built from simple grocery ingredients, you likely already have everything you need.
What is Pioneer Woman Ice Cream Cake?
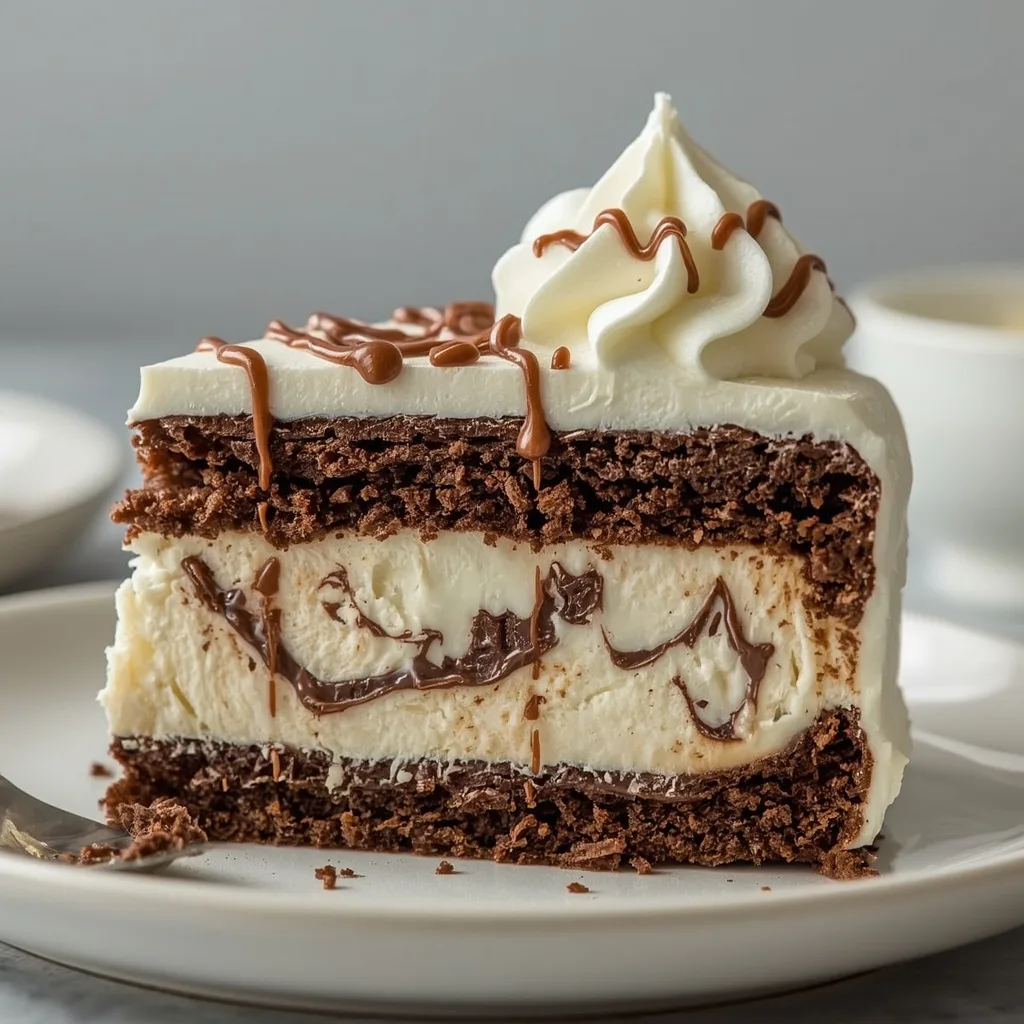
This is a no-bake layered dessert that starts with a pressed chocolate cookie crust. On top goes a layer of softened vanilla ice cream, then a spread of warmed hot fudge sauce, followed by a layer of softened chocolate ice cream. The whole thing freezes solid, then gets a cap of sweetened whipped cream. The result is a cool, sliceable cake with distinct layers that hold their shape when cut.
Why You’ll Love This Recipe
- No oven required — The entire cake comes together on the counter and in the freezer. Perfect for hot weather when you refuse to heat up the kitchen.
- Make-ahead friendly — Assemble the cake up to three days in advance and keep it frozen. Just add the whipped cream and garnishes right before serving.
- Customizable to your tastes — Swap the ice cream flavors, change the sauce, or use different cookies for the crust. The method stays the same.
- Crowd-pleasing texture contrast — The crunchy cookie crust, creamy ice cream layers, and fluffy whipped topping give every forkful something different.
- Simple ingredients only — You need eight ingredients total, and every one is available at any grocery store. No specialty items to track down.
- Clean slices every time — The loaf pan shape and plastic wrap lining make unmolding easy. A hot knife gives you neat, bakery-style slices.
Essential Ingredients for Pioneer Woman Ice Cream Cake
Every ingredient here has a specific job, and each one is easy to find. Stick with the exact amounts listed for the best structure.
- Chocolate wafer crumbs — 1 cup, from about 8 chocolate sandwich cookies finely crushed. These form the crust base and give a deep chocolate flavor with a sandy, firm texture when pressed.
- Unsalted butter, melted — 3 tablespoons. This binds the crumbs together so the crust holds its shape after freezing. Salted butter works in a pinch but skip any extra salt.
- Vanilla ice cream, slightly softened — 1 cup. Choose a full-fat vanilla for the creamiest texture. Let it sit at room temperature 10-15 minutes until it reaches a yogurt-like consistency for easy spreading.
- Chocolate ice cream, slightly softened — 1 cup. A rich chocolate variety works best here. Soften it the same way as the vanilla layer.
- Hot fudge sauce, warmed slightly — 1/2 cup. Warm it just enough to spread easily but not so hot that it melts the ice cream beneath it. Leave a 1/2-inch border around the edges to prevent seeping.
- Heavy cream, cold — 1/2 cup. This whips into a stable topping. Keep it well chilled for the best volume and texture.
- Powdered sugar — 2 tablespoons. Adds just enough sweetness to the whipped cream without making it grainy. No need to sift unless it is lumpy.
- Optional garnishes — Maraschino cherries or sprinkles. These add color and a little extra flair but are not required for the cake to shine.
Equipment You’ll Need
- 4×8-inch loaf pan — This is the standard size that gives the cake its shape. A 6-inch springform pan lined with plastic wrap also works if you do not have a loaf pan.
- Plastic wrap — Line the pan with overhang on all sides so you can lift the frozen cake out cleanly. Do not skip this step.
- Medium mixing bowl and fork — For combining the cookie crumbs and melted butter. A fork works better than a spoon for even moisture distribution.
- Small offset spatula — Makes smoothing the ice cream layers much easier. A regular butter knife works but takes more patience.
- Hand mixer and large chilled bowl — For whipping the cream. A whisk and strong arm work too, but the mixer saves time and gives consistent results every time.
Instructions to Make Pioneer Woman Ice Cream Cake
The process follows a freeze-and-layer rhythm. Work through each step in order and give each layer enough time to firm up before adding the next.
- Prepare the pan — Line the bottom and sides of a 4×8-inch loaf pan with plastic wrap, leaving overhang on all sides. This guarantees you can lift the finished cake out without breaking it.
- Make the crust — In a medium bowl, combine 1 cup chocolate wafer crumbs and 3 tablespoons melted unsalted butter. Stir with a fork until the crumbs are evenly moistened. The mixture should hold together when pinched.
- Press and chill the crust — Press the crumb mixture firmly into an even layer on the bottom of the prepared pan. Use the bottom of a measuring cup to compact it well. Freeze for 10 minutes to set.
- Soften the ice creams — While the crust chills, let the vanilla and chocolate ice cream sit at room temperature for 10-15 minutes until soft enough to spread but not melted. You want a yogurt-like consistency.
- Add the vanilla layer — Remove the pan from the freezer. Spread the softened vanilla ice cream evenly over the crust. Smooth the top with a small offset spatula and freeze for 20 minutes until firm to the touch.
- Spread the hot fudge — Once the vanilla layer is firm, spread the warmed hot fudge sauce over it, leaving a 1/2-inch border around the edges. The warm fudge will set quickly against the cold ice cream.
- Add the chocolate layer — Carefully spread the softened chocolate ice cream over the hot fudge layer, smoothing the top. Press a piece of plastic wrap directly onto the surface to prevent freezer burn. Freeze for at least 4 hours or overnight until completely firm.
- Make the whipped cream — When ready to serve, combine 1/2 cup cold heavy cream and 2 tablespoons powdered sugar in a large chilled bowl. Beat with a hand mixer on medium-high speed until soft peaks form, about 2-3 minutes. Do not overbeat or it will turn into butter.
- Unmold the cake — Remove the cake from the freezer. Use the plastic overhang to lift it out of the pan and transfer it to a serving board. Peel off the plastic wrap.
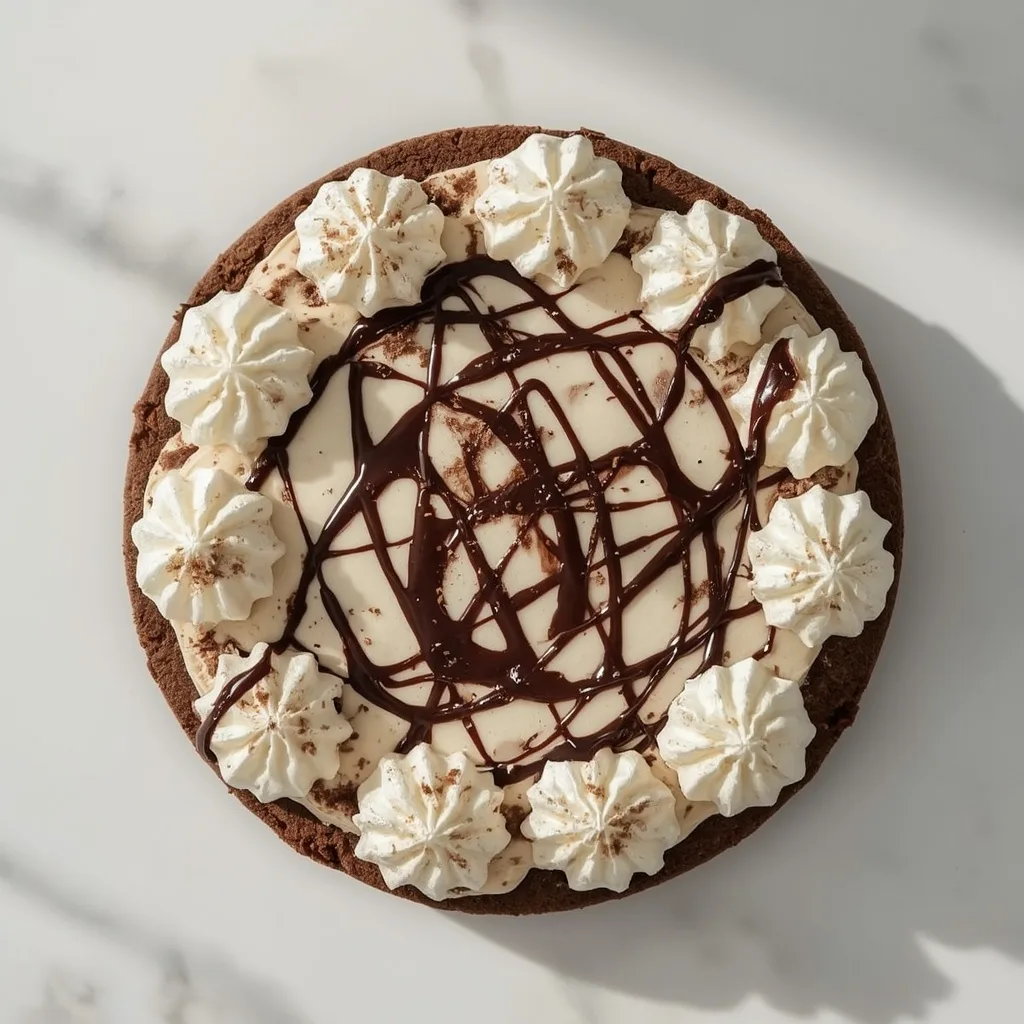
- Top and garnish — Spread or pipe the whipped cream over the top of the cake. Add maraschino cherries or sprinkles if using.
- Slice and serve — Use a sharp knife dipped in hot water and wiped dry between cuts. Let the cake sit at room temperature for 5 minutes to soften slightly before serving.
Common Mistakes I Made (And How I Fixed Them)
- Ice cream too melted — I let the ice cream sit too long and it turned soupy, making the layers run together. Now I set a timer for 12 minutes and check it at the 10-minute mark. It should hold its shape but spread easily.
- Fudge seeped over the edges — I spread hot fudge all the way to the sides of the pan, and it bled into the chocolate ice cream layer. Leaving that 1/2-inch border solved it completely.
- Crumb crust crumbled when slicing — I did not pack the crust firmly enough with the measuring cup. Pressing it down with real force and freezing it for the full 10 minutes fixed the crumbling issue.
- Whipped cream turned grainy — I walked away while beating the cream and came back to butter. Now I watch it closely and stop the mixer as soon as soft peaks form, usually around 2 minutes.
- Cake stuck in the pan — I tried to skip the plastic wrap because it seemed wasteful. That was a mistake. The wrap overhang is the only thing that lets you lift the cake out in one piece, so do not skip it.
Best Tips for Pioneer Woman Ice Cream Cake Success
- Soften ice cream gradually — Let it sit at room temperature 10-15 minutes. Speed it up with microwave bursts at 30% power, 10 seconds at a time, but watch closely so it does not melt.
- Press the crust with a flat surface — Use the bottom of a dry measuring cup to compact the crumbs. This creates a firm, even base that will not fall apart when you slice the finished cake.
- Leave a border when adding fudge — Keep the hot fudge a half inch away from the pan walls. This prevents it from seeping into the chocolate ice cream layer and keeps the stripe of fudge neat in each slice.
- Freeze each layer fully before adding the next — The vanilla layer needs at least 20 minutes in the freezer. Rushing this step makes the layers blend together instead of staying distinct.
- Press plastic wrap directly onto the surface — Before the final freeze, lay a piece of plastic wrap right on top of the chocolate ice cream. This stops ice crystals from forming and keeps the top smooth.
- Dip your knife in hot water between cuts — Run the blade under hot tap water and wipe it dry before each slice. This gives you clean, sharp edges instead of smeared layers.
- Let the cake rest 5 minutes before serving — Pull it from the freezer, add the whipped cream, then wait 5 minutes at room temperature. The cake softens just enough for easy slicing without melting.
Best Ingredient Swaps for Pioneer Woman Ice Cream Cake
- Cookie crust swap — Replace chocolate wafer crumbs with crushed Oreos (cream and all) or graham cracker crumbs. Oreos make a richer crust, while graham crackers give a milder, sweeter base. Use the same quantity.
- Ice cream flavor swap — Use any combination of ice cream flavors instead of vanilla and chocolate. Strawberry and chocolate chip, cookies and cream, or coffee and caramel all work well. Just keep the total volume the same.
- Hot fudge replacement — Swap the hot fudge sauce with caramel sauce, butterscotch sauce, or a berry compote. Each changes the flavor profile significantly, so choose based on the ice cream flavors you use.
- Whipped cream alternative — Use a store-bought whipped topping like Cool Whip instead of homemade whipped cream. The texture is slightly less rich but it saves time and holds its shape well on the frozen cake.
- Garnish substitutions — Skip the cherries and sprinkles and use crushed candy bars, chocolate shavings, or toasted nuts instead. These add crunch and visual appeal without extra sugar.
Delicious Variations to Try
- Mint chocolate chip version — Use mint chocolate chip ice cream for both layers and swap the hot fudge for a thin layer of chocolate ganache. Garnish with crushed Andes mints on top.
- Peanut butter cup version — Use chocolate ice cream for both layers and swirl creamy peanut butter into the hot fudge before spreading. Top the finished cake with chopped peanut butter cups.
- Berry vanilla version — Use vanilla ice cream for both layers and replace the hot fudge with a thick strawberry jam or raspberry sauce. Garnish with fresh berries and white chocolate shavings.
- Cookies and cream version — Use cookies and cream ice cream for both layers and crumble additional chocolate sandwich cookies over the whipped cream topping. The extra crunch is fantastic.
- Mocha version — Use coffee ice cream for the bottom layer and chocolate ice cream for the top. Stir a teaspoon of instant espresso powder into the hot fudge before spreading for a deeper coffee flavor.
How to Store Leftovers Properly
- Wrap the cake tightly — After slicing, press a layer of plastic wrap directly onto the cut surface of the remaining cake, then cover the entire pan or board with another layer. This prevents freezer burn and ice crystal formation.
- Store in an airtight container — If you have a container large enough, place the cake or individual slices inside and seal it. Glass or plastic containers with tight lids work equally well. Leftovers keep for up to two weeks.
- Add whipped cream fresh — Only add the whipped cream to the portion you are serving right away. Store the remaining cake without topping, then whip fresh cream when you want another slice. Leftover whipped cream deflates and gets watery.
How to Reheat Pioneer Woman Ice Cream Cake
This is a frozen dessert, so traditional reheating is not the goal. The key is softening it slightly for the best texture without melting the layers.
- Room temperature rest — Let a slice sit on the counter for 3-5 minutes before eating. This softens it to a scoopable consistency while keeping the cake intact. Any longer and it starts to melt.
- Microwave on low power — If you want it softer, microwave a single slice on 30% power for 8-10 seconds. Watch it closely — any longer and the ice cream turns to soup.
- Cold knife trick for leftovers — For slices that have been stored a few days, dip your knife in cold water instead of hot before cutting. The cold blade helps the frozen cake slice cleanly without extra softening.
Nutritional Breakdown (Per Serving)
This recipe makes 4 generous servings. Each slice is rich and satisfying, so a little goes a long way.
- Calories: 542
- Protein: about 5g
- Fat: around 37g
- Carbohydrates: 55g
- Fiber: close to 1g
- Sugar: about 46g
- Sodium: roughly 260mg
FAQs
Can I freeze Pioneer Woman Ice Cream Cake for longer than 4 hours?
Yes, you can freeze it for up to two weeks if wrapped tightly. For longer storage, wrap the entire pan in a layer of plastic wrap followed by a layer of aluminum foil. The cake maintains its best texture and flavor within the first week.
Do I need a special loaf pan for this recipe?
A standard 4×8-inch loaf pan works perfectly. If you do not have one, use a 6-inch springform pan lined with plastic wrap. The shape changes slightly but the layering method stays the same.
Can I use low-fat or dairy-free ice cream for this cake?
You can, but the texture will be less creamy and the layers may freeze harder than desired. Full-fat ice cream gives the best structure and mouthfeel. If you go dairy-free, choose a rich coconut or oat milk-based brand.
Why did my hot fudge layer freeze into hard chunks?
The fudge was likely too cold when you spread it, or you used a sauce that thickens significantly when frozen. Warm the fudge just until it is pourable, and spread it quickly over the firm vanilla layer. A quality hot fudge sauce with real cream stays pliable even when frozen.
How do I get clean slices without the layers smearing?
Dip a sharp knife in hot water and wipe it dry between each cut. Let the cake sit at room temperature for 5 minutes before slicing. The slight softening makes the knife glide through without dragging the layers.
Can I double this recipe for a larger cake?
Yes, but you need a larger pan. Double all ingredients and use a 9×5-inch loaf pan or an 8-inch springform pan. Increase the freezing time between layers to 30 minutes for the vanilla and at least 6 hours for the final freeze.
Try These Recipes
Final Words
The Pioneer Woman Ice Cream Cake delivers all the indulgence of a bakery dessert with none of the baking. The no-fuss assembly and simple ingredients make it a recipe you will come back to again and again. Give it a try for your next celebration or just because it is hot outside — you will be glad you did.
Pioneer Woman Ice Cream Cake
A decadent no-bake ice cream cake with a chocolate cookie crust, layers of vanilla and chocolate ice cream, a ribbon of warm hot fudge, and a fluffy whipped cream topping. Each slice is creamy, crunchy, and perfectly indulgent for a summer treat or any celebration.
SAVE THIS RECIPE!
Get this sent to your inbox, plus get new recipes from us every week!
INGREDIENTS
INSTRUCTIONS
-
1
Line the bottom and sides of a 4×8-inch loaf pan with plastic wrap, leaving overhang on all sides. This ensures easy removal of the cake once frozen.
-
2
In a medium bowl, combine 1 cup chocolate wafer crumbs and 3 tablespoons melted unsalted butter. Stir with a fork until the crumbs are evenly moistened. The mixture should hold together when pinched.
-
3
Press the crumb mixture firmly into an even layer on the bottom of the prepared loaf pan. Use the bottom of a measuring cup to compact it well. Place the pan in the freezer for 10 minutes to set.
-
4
While the crust chills, let the vanilla and chocolate ice cream sit at room temperature for 10-15 minutes until they are soft enough to spread but not melted. You want a yogurt-like consistency.
-
5
Remove the pan from the freezer. Spread the softened vanilla ice cream evenly over the crust. Use a small offset spatula to smooth the top. Freeze for 20 minutes until firm to the touch.
-
6
After the vanilla layer is firm, spread the hot fudge sauce over it, leaving a 1/2-inch border around the edges. The warm fudge will set quickly against the cold ice cream; spread it in an even layer.
-
7
Carefully spread the softened chocolate ice cream over the hot fudge layer, smoothing the top. Press a piece of plastic wrap directly onto the surface of the ice cream to prevent freezer burn. Freeze for at least 4 hours or overnight until completely firm.
-
8
When ready to serve, make the whipped cream: In a large chilled bowl, combine 1/2 cup cold heavy cream and 2 tablespoons powdered sugar. Beat with a hand mixer on medium-high speed until soft peaks form, about 2-3 minutes. Be careful not to overbeat or it will turn into butter.
-
9
Remove the cake from the freezer. Use the plastic overhang to lift the cake out of the loaf pan and transfer to a serving board. Peel off the plastic wrap.
-
10
Spread or pipe the whipped cream over the top of the cake. Optionally, garnish with maraschino cherries or sprinkles.
-
11
Slice with a sharp knife dipped in hot water for clean cuts. Let the cake sit at room temperature for 5 minutes to soften slightly before serving.
NUTRITION
Calories: 542kcal | Carbohydrates: 55g | Protein: 5g | Fat: 37g | Sodium: 260mg | Fiber: 1g | Sugar: 46g
Nutrition information is automatically calculated, so should only be used as an approximation.
