Pioneer Woman 7 Layer Cookie Bars Recipe
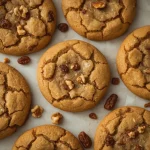
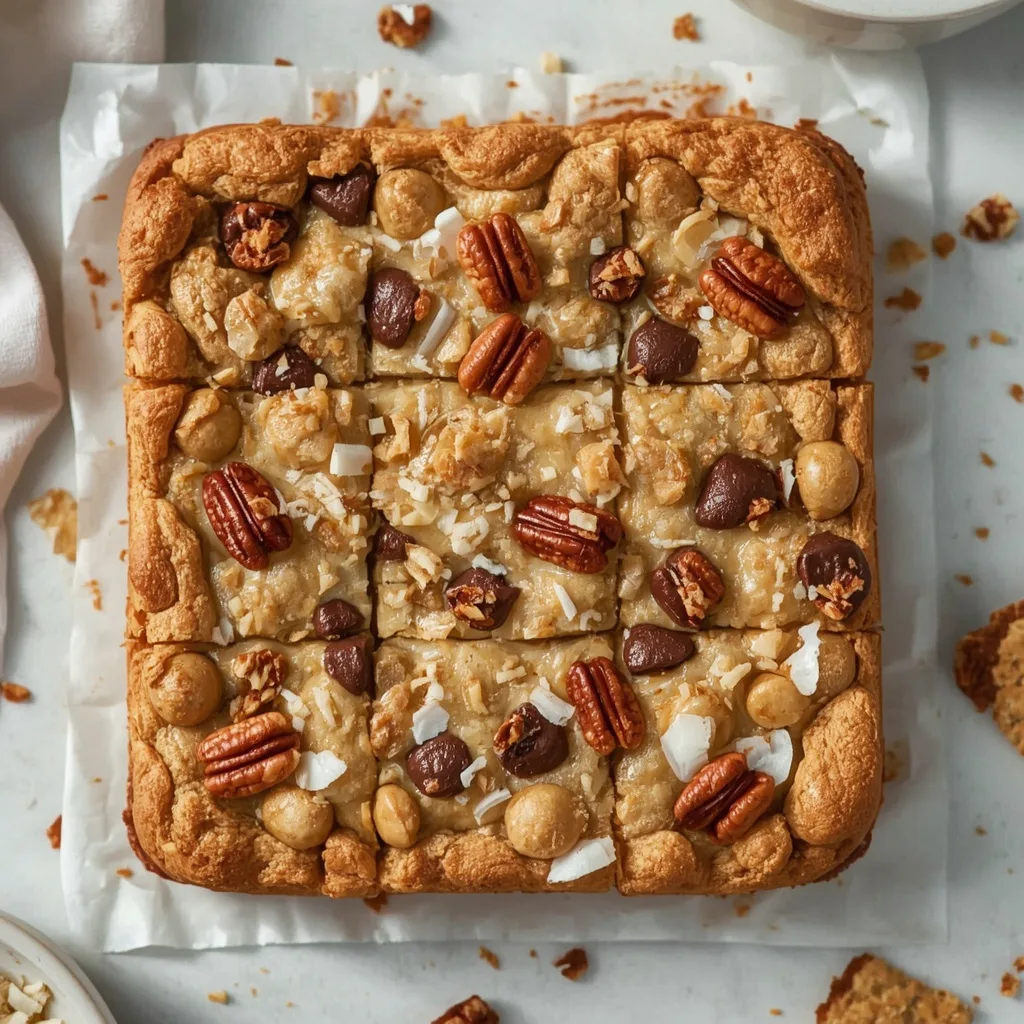
Pioneer Woman 7 Layer Cookie Bars are the kind of dessert that disappears before you even get a chance to snap a photo. With a buttery graham cracker crust, layers of chocolate and butterscotch chips, sweetened coconut, a drizzle of condensed milk, and crunchy pecans, every bite is a mix of chewy, crunchy, and gooey.
This recipe is perfect for potlucks, holiday cookie exchanges, or a simple weekend baking project. It takes just 15 minutes to prep and 28 minutes in the oven, so you can have a batch ready in under an hour. The American-style layered dessert relies on pantry staples and one baking dish.
What are Pioneer Woman 7 Layer Cookie Bars?
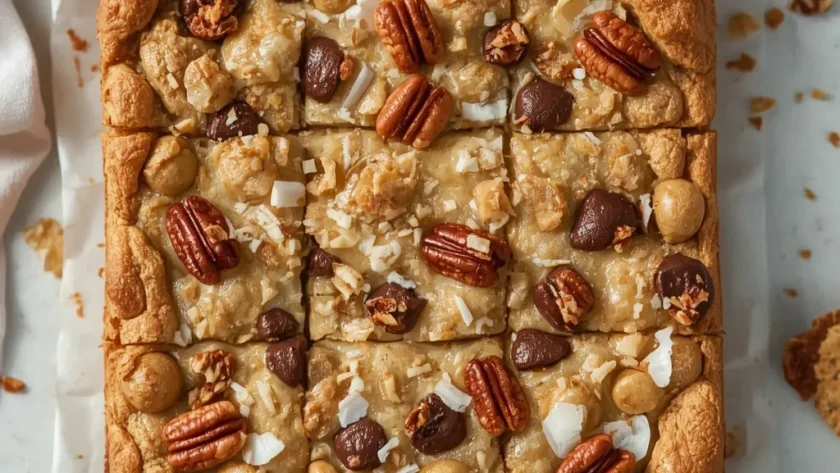
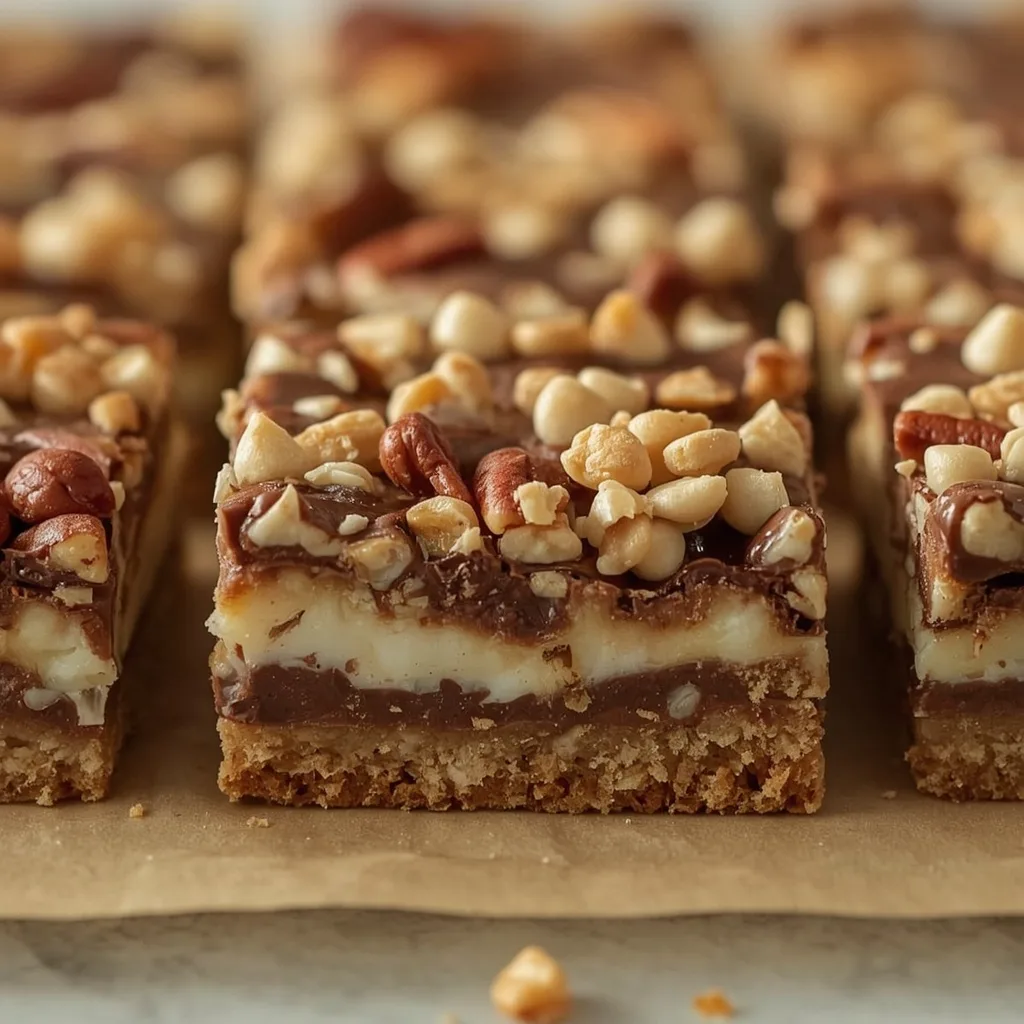
These are small, square bars built from seven distinct ingredients stacked in a specific order. The base is a pressed graham cracker crust, then come semi‑sweet chocolate chips and butterscotch chips, a layer of sweetened flaked coconut, a generous drizzle of sweetened condensed milk, and finally chopped pecans. After baking, the condensed milk caramelizes around the edges while the coconut toasts, creating a bar that is firm enough to hold together but still soft and sticky in the center.
Why You’ll Love This Recipe
- Simple ingredient list — Only seven ingredients, most of which you probably already have in your pantry. No stand mixer or special tools needed.
- Quick prep time — From start to oven in 15 minutes. No chilling, no resting, no complicated steps.
- Perfect for sharing — The bars slice neatly into four generous pieces, but you can easily double the recipe for a larger crowd.
- Customizable by layer — Swap chips, nuts, or even the crust without changing the overall method. The structure is forgiving.
- Kid‑friendly activity — Little hands can help sprinkle layers and press the crust. It’s a great introduction to baking.
- Stays fresh for days — Keep them at room temperature for up to three days, or refrigerate for a week. The texture actually improves after a day.
Essential Ingredients for Pioneer Woman 7 Layer Cookie Bars
Only seven ingredients go into the dish, so each one matters. Here is exactly what you need and why.
- Graham cracker crumbs (¼ cup) — The foundation. You can crush whole graham crackers or buy pre‑crushed crumbs. Press them firmly into the dish so the base doesn’t crumble when you cut the bars.
- Unsalted butter, melted (1½ tbsp) — Binds the crumbs together. Use room‑temperature butter for easier mixing; cold butter won’t coat the crumbs evenly. If you only have salted butter, skip adding any extra salt.
- Semi‑sweet chocolate chips (3 tbsp) — Provide the classic chocolate layer. Mini chips distribute more evenly, but regular chips work fine. Dark chocolate chips also work if you prefer less sweetness.
- Butterscotch chips (3 tbsp) — Add a buttery, caramel‑like sweetness that contrasts with the chocolate. Butterscotch chips can be hard to find in some stores; you can substitute white chocolate chips or peanut butter chips.
- Sweetened flaked coconut (3 tbsp) — Toasts during baking and adds chewiness. Unsweetened coconut will not brown as well and the bars will be less sweet. For extra chew, add an extra tablespoon as noted in the recipe.
- Sweetened condensed milk (¼ cup) — The glue that holds everything together. Drizzle it evenly over the coconut layer; do not pour it all in one spot. Leftover condensed milk from a 14‑ounce can can be stored in the fridge for a week or frozen for later.
- Chopped pecans (3 tbsp) — Give a crunchy finish. Toast them briefly in a dry pan for deeper flavor before adding. Walnuts or sliced almonds are fine substitutes.
Equipment You’ll Need
You do not need a lot of gear to make these bars, but the right tools make the process smoother.
- 6×6‑inch baking dish — The recipe is scaled for a small pan. An 8×4‑inch loaf pan or a 5×5‑inch dish also works, though the bars will be thicker or thinner. Avoid anything larger than 8 inches.
- Parchment paper — Cut a piece long enough to hang over two opposite sides of the dish. This creates “handles” that let you lift the entire block of bars out cleanly after cooling.
- Small mixing bowl — For combining the graham cracker crumbs and melted butter. A cereal bowl is fine.
- Fork or spoon — Use a fork to stir the crust mixture and a spoon to press it into the dish. The back of a measuring spoon also works well for pressing.
- Sharp knife — Once the bars are fully cooled, a sharp chef’s knife gives clean edges. A dull knife will drag through the sticky layers.
Instructions to Make Pioneer Woman 7 Layer Cookie Bars
The method is straightforward, but paying attention to each step ensures the layers stay distinct and the bars cut neatly. Here is exactly what to do.
- Preheat and prepare the dish — Set the oven to 350 °F (177 °C). Line a 6×6‑inch baking dish with parchment paper, leaving overhang on two opposite sides. This prevents sticking and makes removal a breeze.
- Make the crust — In a small bowl, combine ¼ cup graham cracker crumbs with 1½ tablespoons melted butter. Stir with a fork until every crumb is moistened. Press the mixture firmly into the bottom of the dish using your fingers or the back of a spoon. A compact crust prevents crumbling later.
- Layer the chips — Sprinkle 3 tablespoons semi‑sweet chocolate chips evenly over the crust, then follow with 3 tablespoons butterscotch chips. Try to scatter them so each bar gets a bit of both.
- Add the coconut — Sprinkle 3 tablespoons sweetened flaked coconut over the chips. The coconut will toast in the oven and add chewiness.
- Drizzle the condensed milk — Pour ¼ cup sweetened condensed milk evenly over the coconut. Use a spoon to spread it if necessary. The milk binds all the dry ingredients and creates the signature gooey texture.
- Top with pecans — Sprinkle 3 tablespoons chopped pecans over the condensed milk. Press down lightly with a spatula so the nuts stick.
- Bake — Place the dish in the oven and bake for 25–30 minutes. The edges should be golden brown and the center set but still slightly jiggly. Overbaking dries out the bars, so start checking at 25 minutes.
- Cool completely — Transfer the pan to a wire rack and let it cool for about 1 hour. Do not rush this step. The bars firm up as they cool, and cutting too early turns them into a sticky mess.
- Slice and serve — Once cool, lift the parchment paper to remove the block of bars. Place it on a cutting board and cut into 4 equal rectangles or squares. Use a sharp knife with a single sawing motion for the cleanest edges.
- Store leftovers — Keep in an airtight container at room temperature for up to 3 days, or refrigerate for up to a week. Serve at room temperature for the best texture.
Common Mistakes I Made (And How I Fixed Them)
I have made these bars more times than I can count, and a few things tripped me up early on. Here is what happened and how to avoid it.
- Crumbly crust — I did not press the graham cracker mixture firmly enough, and the bottom fell apart when I cut the bars. Fix: use the back of a spoon to really compact the crust, especially along the edges. A firmer press equals a sturdier base.
- Uneven condensed milk layer — I poured the condensed milk in one spot, and it pooled in the center while the edges stayed dry. Fix: drizzle it in a zigzag pattern and then use a spoon to spread it until it covers the coconut evenly.
- Overbaked and dry bars — I left them in for the full 30 minutes on a hot oven, and the bars came out brittle. Fix: start checking at 25 minutes. The center should still jiggle slightly; residual heat will finish setting it as they cool.
- Sticky cutting disaster — I tried to cut the bars while they were still warm, and the layers smeared everywhere. Fix: wait the full hour for cooling. If you are in a hurry, refrigerate the pan for 20 minutes after it comes to room temperature, then slice.
- Burnt coconut edges — My oven runs hot, and the coconut on the edges turned black before the center was set. Fix: place the dish on the middle rack and rotate it halfway through baking. If your oven tends to brown quickly, tent the pan with foil for the last 5 minutes.
Best Tips for Pioneer Woman 7 Layer Cookie Bars Success
These small adjustments make a real difference in how the bars turn out. Follow them and you will avoid most common pitfalls.
- Line with parchment — Even if your dish is nonstick, use parchment with overhang. It makes lifting the bars out foolproof and prevents any sticking at the bottom.
- Use room‑temperature butter for the crust — Cold butter does not mix evenly with the crumbs, leaving dry patches that won’t hold together. Let it sit out for 10 minutes if needed.
- Press the crust firmly and evenly — The denser the base, the easier it is to slice later. Use a flat‑bottomed glass to press it down if your fingers are not enough.
- Distribute chips and toppings evenly — Count the chocolate and butterscotch chips as you sprinkle them, or at least scatter them so each quadrant gets a similar amount. No one wants a bar with only coconut.
- Cool completely before cutting — This is the single most important tip. Warm condensed milk is runny; cold condensed milk is firm. Give the bars a full hour on the counter, or 30 minutes in the fridge after they reach room temperature.
- Cut with a sharp knife in one motion — A serrated knife works well, but a straight chef’s knife also does the job. Wipe the blade clean between cuts for neat edges.
- Toast the pecans lightly — Raw pecans are fine, but a quick toast in a dry skillet (2‑3 minutes over medium heat) brings out their nutty flavor and adds crunch.
Best Ingredient Swaps for Pioneer Woman 7 Layer Cookie Bars
This recipe is flexible, so you can adapt it to what you have on hand or to dietary needs. Here are swaps that actually work.
- Graham cracker crumbs — Use crushed vanilla wafers, shortbread cookies, or digestive biscuits instead. The flavor changes slightly but the texture stays similar.
- Semi‑sweet chocolate chips — Milk chocolate chips make the bars sweeter, while dark chocolate chips (60–70% cocoa) add a deeper, less sugary note. White chocolate chips also work.
- Butterscotch chips — Replace with peanut butter chips for a salty‑sweet twist, or with white chocolate chips and a pinch of salt for a similar caramel effect.
- Sweetened flaked coconut — Unsweetened coconut is acceptable but the bars will be less sweet and the coconut will not brown as well. Add an extra tablespoon of condensed milk to compensate.
- Chopped pecans — Walnuts, almonds, or even crushed pretzels (for sweet‑salty) work beautifully. Skip nuts entirely for a nut‑free version.
Delicious Variations to Try
Once you have mastered the classic version, these variations keep things interesting.
- Peanut butter cup bars — Replace the butterscotch chips with peanut butter chips and add a handful of mini peanut butter cups on top before baking.
- Mint chocolate bars — Use mint‑filled chocolate chips instead of semi‑sweet chips, or add ¼ teaspoon peppermint extract to the melted butter.
- Caramel pecan bars — Drizzle 2 tablespoons of caramel sauce over the condensed milk, and top with extra pecans. Reduce the sugar slightly if the caramel is very sweet.
- Tropical bars — Swap the butterscotch chips for white chocolate chips, add a tablespoon of dried mango or pineapple, and use macadamia nuts instead of pecans.
- Gluten‑free version — Use gluten‑free graham cracker crumbs (or crushed gluten‑free cookies). The rest of the ingredients are naturally gluten‑free. Double‑check the butterscotch chip label.
How to Store Leftovers Properly
These bars store well, but the method matters to keep them from drying out or turning sticky.
- Room temperature — Place the bars in an airtight container with a sheet of wax paper between layers. They stay fresh for up to 3 days. Do not refrigerate unless you want a firmer texture.
- Refrigerator — For longer storage, seal the bars in an airtight container and refrigerate for up to 1 week. Bring them to room temperature before serving to restore the soft, gooey texture.
- Freezer — Wrap each bar individually in plastic wrap, then place them in a freezer‑safe bag. Freeze for up to 3 months. Thaw in the refrigerator overnight, then let them sit at room temperature for 15 minutes before eating.
How to Reheat Pioneer Woman 7 Layer Cookie Bars
If you prefer your cookie bars warm and gooey, a quick reheat brings back that fresh‑from‑the‑oven feel.
- Microwave — Place one bar on a microwave‑safe plate and heat on high for 10–15 seconds. The center will soften but the edges stay firm. Do not overdo it or the condensed milk will bubble and turn into a sticky puddle.
- Oven — Preheat to 300 °F (149 °C). Place the bars on a parchment‑lined baking sheet and warm for 5–7 minutes. This method gently reheats the entire bar without melting the layers.
- Air fryer — Set the air fryer to 300 °F (149 °C) and warm a single bar for 3–4 minutes. The edges crisp slightly, which is a nice contrast to the soft center.
Nutritional Breakdown (Per Serving)
This recipe makes 4 bars. One serving (1 bar) contains:
- Calories: 245
- Protein: 3g
- Fat: 16g
- Carbohydrates: 26g
- Fiber: 1g
- Sugar: 21g
- Sodium: about 101mg
FAQs
Can I double this recipe for Pioneer Woman 7 Layer Cookie Bars?
Yes, double all ingredients and use an 8×8‑inch or 9×9‑inch baking dish. Increase the baking time to 30–35 minutes. Check for doneness at 30 minutes.
Why are my bars too soft even after cooling?
If they are still too soft after 1 hour of cooling, the condensed milk may have been poured too thickly, or the bars were not baked long enough. Next time, spread the condensed milk in a thin, even layer and bake until the edges are deep golden brown.
Can I use a different size pan for this recipe?
A 6×6‑inch dish is ideal. An 8×4‑inch loaf pan works well too. If you use a larger pan, the layers will be thinner and the bars will bake faster. Check at 20 minutes.
How do I keep the coconut from burning?
If your oven runs hot, place the dish on the middle rack and check at 25 minutes. You can also tent the pan loosely with foil for the last 5 minutes of baking.
Can I freeze Pioneer Woman 7 Layer Cookie Bars?
Absolutely. Wrap each bar tightly in plastic wrap, then place them in a freezer bag. They freeze well for up to 3 months. Thaw in the refrigerator before serving.
What can I use instead of butterscotch chips?
White chocolate chips, peanut butter chips, or toffee bits are all good substitutes. Each changes the flavor, but the layered structure remains the same.
Try These Recipes
- Pioneer Woman Brownie Cookies
- Pioneer Woman Fruitcake Cookies
- Pioneer Woman Cookie Dough Bars
- Pioneer Woman Chicken Rice Casserole
Final Words
Pioneer Woman 7 Layer Cookie Bars are one of the easiest desserts you can make, and they never fail to impress. The combination of chocolate, butterscotch, coconut, and pecans in a buttery crust is pure comfort. Try this recipe for your next bake day — you will see exactly why it is a classic.
Pioneer Woman 7 Layer Cookie Bars
These classic 7-layer cookie bars feature a buttery graham cracker crust topped with layers of chocolate and butterscotch chips, sweetened coconut, condensed milk, and pecans. Baked until golden and gooey, they deliver a perfect balance of crunchy, chewy, and sweet in every bite.
SAVE THIS RECIPE!
Get this sent to your inbox, plus get new recipes from us every week!
INGREDIENTS
INSTRUCTIONS
-
1
Preheat oven to 350 F (177 C). Line a 6×6-inch baking dish (or similar small dish) with parchment paper, leaving overhang on two sides for easy removal. This ensures the bars come out cleanly.
-
2
In a small bowl, combine 1/4 cup graham cracker crumbs and 1.5 tablespoons melted butter. Stir with a fork until the crumbs are evenly moistened. Press the mixture firmly into the bottom of the prepared dish using the back of a spoon or your fingers. A compact crust prevents the bars from crumbling.
-
3
Sprinkle 3 tablespoons semi-sweet chocolate chips evenly over the crust, followed by 3 tablespoons butterscotch chips. Distribute them so each bar gets a mix of both.
-
4
Sprinkle 3 tablespoons sweetened flaked coconut over the chip layer. The coconut will toast during baking, adding chewiness and flavor.
-
5
Drizzle 1/4 cup sweetened condensed milk evenly over the coconut layer. Use a spoon to spread it if needed. The condensed milk binds the layers and creates a gooey texture.
-
6
Sprinkle 3 tablespoons chopped pecans on top. Press down lightly with a spatula to help the nuts adhere.
-
7
Bake for 25-30 minutes, until the edges are golden brown and the center is set but still slightly jiggly. Overbaking will make the bars dry. The coconut should be lightly toasted.
-
8
Remove from oven and let cool completely in the pan on a wire rack, about 1 hour. Cooling is essential for clean slicing; bars will firm up as they cool.
-
9
Once cool, lift the parchment to remove the block of bars. Place on a cutting board and cut into 4 equal rectangles or squares. Use a sharp knife for clean edges.
-
10
For best texture, serve at room temperature. Store leftovers in an airtight container at room temperature for up to 3 days, or refrigerate for up to a week.
NOTES
- Press the crust firmly to avoid crumbling.
- Use room temperature butter for easier mixing.
- Let the bars cool completely before cutting to prevent gooey mess.
- Line the pan with parchment for easy removal.
- For extra chewiness, add an extra tablespoon of coconut.
NUTRITION
Serving: 1 | Calories: 245kcal | Carbohydrates: 26g | Protein: 3g | Fat: 16g | Saturated Fat: 7.5g | Cholesterol: 13.5mg | Sodium: 101mg | Fiber: 1g | Sugar: 21g
Nutrition information is automatically calculated, so should only be used as an approximation.