Pioneer Woman Red Velvet Cookies Recipe
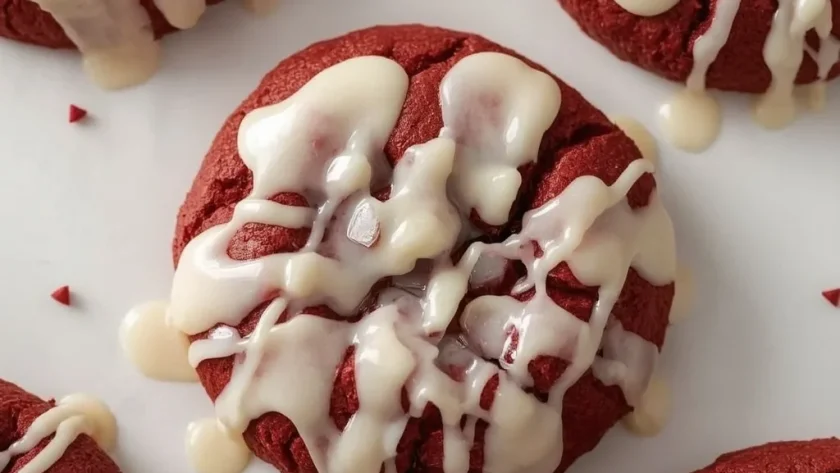
These Pioneer Woman Red Velvet Cookies bring together the best of a classic Southern cake in cookie form. The deep cocoa flavor pairs beautifully with a tangy cream cheese glaze, making each bite rich and satisfying.
They are perfect for holidays, Valentine’s Day, or any time you want a striking dessert. With just 20 minutes of prep and 12 minutes of baking, these soft-baked cookies come together easily using American baking techniques. The cream cheese glaze adds a luscious finish that tastes just like the original cake.
What are Pioneer Woman Red Velvet Cookies?
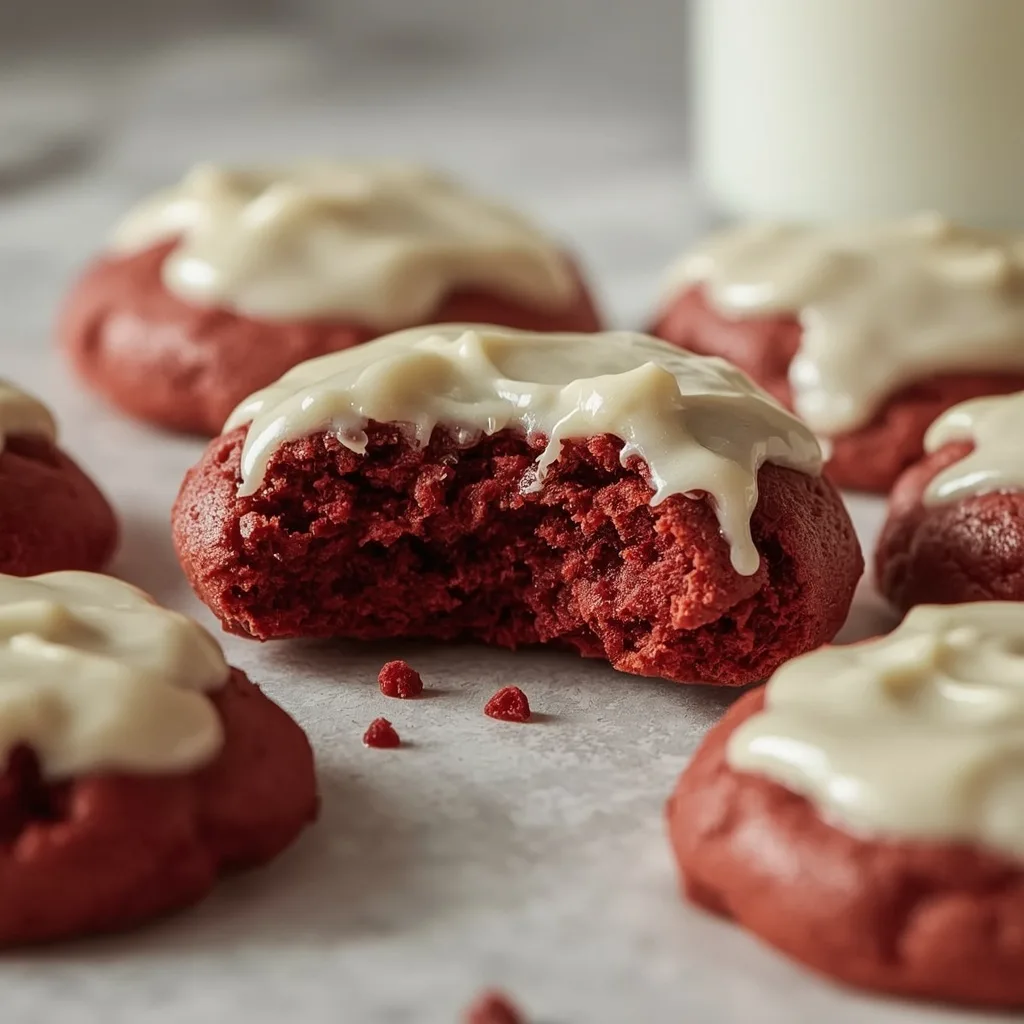
These are soft, thick cookies made with cocoa powder, red food coloring, and buttermilk. They mimic the flavor and texture of red velvet cake in a handheld treat. The cookies are topped with a smooth cream cheese glaze that balances the mild chocolate taste with a tangy sweetness. The result is a tender, almost cake-like cookie with a vibrant red crumb.
Why You’ll Love This Recipe
- Simple ingredients — You likely have most of these in your pantry already. No specialty items needed.
- Quick to make — The dough needs just 30 minutes of chilling, and the cookies bake in under 15 minutes.
- Soft-baked texture — The cream cheese and buttermilk keep these cookies tender for days.
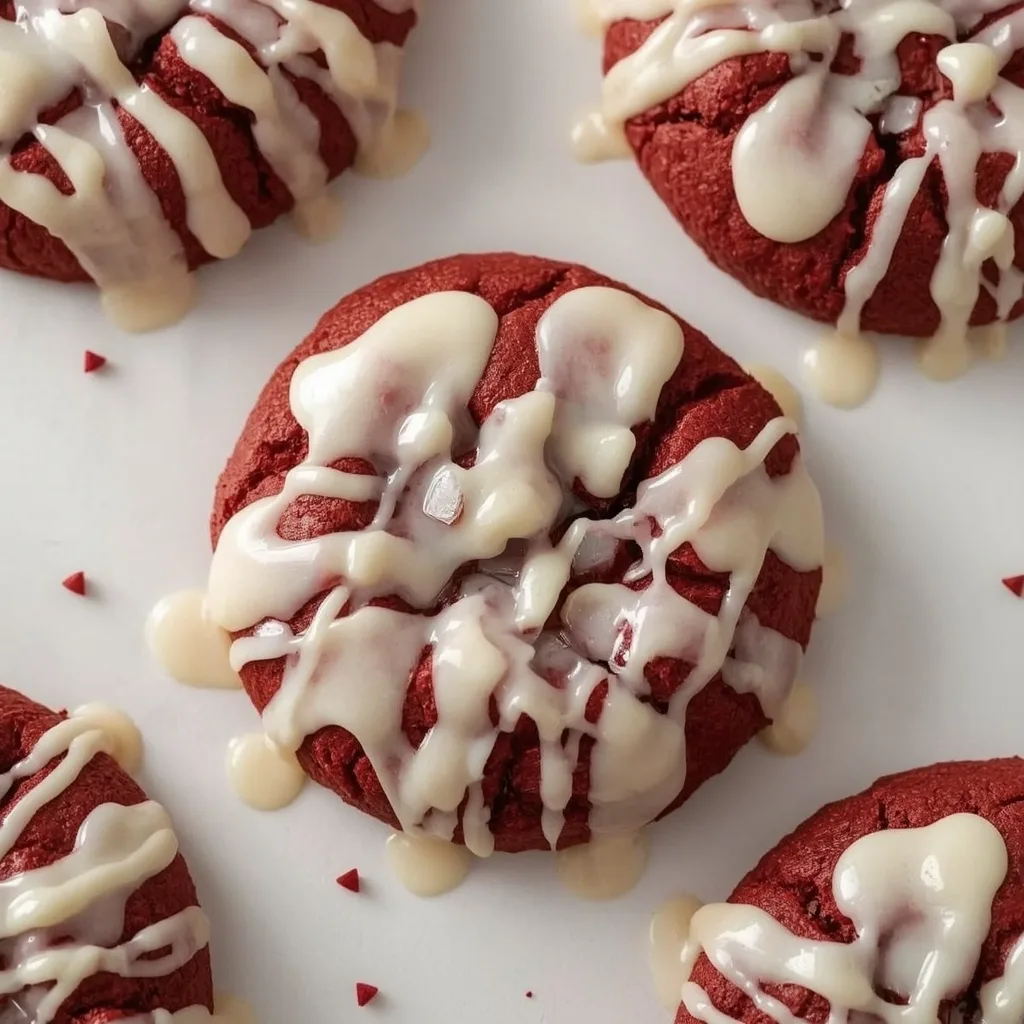
- Stunning presentation — The bright red cookies with white glaze look beautiful on any dessert table.
- Versatile for occasions — Serve them for Christmas, birthdays, or bake sales. They always get noticed.
- Easy to customize — You can swap the glaze, add mix-ins, or adjust the color intensity easily.
Essential Ingredients for Pioneer Woman Red Velvet Cookies
Every ingredient plays a specific role in creating the signature flavor and texture. Here is what you need and why.
For the Cookie Dough
- Unsalted butter (½ cup, softened) — Provides richness and helps create a tender crumb. Make sure it is truly soft, not melted.
- Granulated sugar (1 cup) — Sweetens the dough and contributes to a slightly crisp edge.
- Large egg (1, at room temperature) — Binds the ingredients and adds moisture. Room temperature egg blends more evenly.
- Vanilla extract (1 teaspoon) — Enhances the chocolate flavor without overpowering it.
- Red liquid food coloring (1 tablespoon) — Gives the classic red hue. Gel coloring works better for a deeper shade.
- Buttermilk (1 tablespoon) — Adds tang and activates the baking soda for a soft texture. You can use the milk and vinegar substitute.
- All-purpose flour (1¼ cups) — Provides structure. Spoon and level to avoid packing.
- Unsweetened cocoa powder (2 tablespoons) — Gives the mild chocolate flavor. Do not use Dutch-process here; natural cocoa works best.
- Baking soda (½ teaspoon) — Helps the cookies rise and spread just enough.
- Kosher salt (¼ teaspoon) — Balances the sweetness and enhances all flavors.
For the Cream Cheese Glaze
- Cream cheese (4 ounces, softened) — The base of the glaze. Use full-fat for the creamiest result.
- Unsalted butter (2 tablespoons, softened) — Adds richness and helps the glaze set smoothly.
- Powdered sugar (1 cup, sifted) — Sweetens and thickens the glaze. Sifting prevents lumps.
- Vanilla extract (½ teaspoon) — Adds warmth and depth to the glaze.
- Whole milk (1 to 2 tablespoons) — Adjusts the consistency. Start with 1 tablespoon and add more if needed.
Equipment You’ll Need
- Electric mixer (hand or stand) — Beats the butter and sugar together until light and fluffy. A hand mixer works perfectly fine.
- Large baking sheets (two) — Line them with parchment paper so the cookies release easily and bake evenly.
- Cookie scoop (1.5-tablespoon size) — Ensures uniform dough portions for even baking. A spoon works too, but scooping is faster.
- Wire cooling rack — Lets the cookies cool completely without steaming. Essential before glazing.
- Small piping bag or zip-top bag — Makes drizzling the glaze neat and controlled. A spoon also works if you prefer a rustic look.
Instructions to Make Pioneer Woman Red Velvet Cookies
Follow these steps carefully, especially the chilling and cooling parts. They are the key to perfect texture.
- Preheat and prep — Heat the oven to 350°F (177°C). Line two large baking sheets with parchment paper. In a large bowl, beat ½ cup softened butter and 1 cup granulated sugar with an electric mixer on medium-high until light and fluffy, about 2 minutes.
- Add wet ingredients — Add 1 large egg, 1 teaspoon vanilla, and 1 tablespoon red food coloring. Beat on medium until fully combined, scraping the bowl. Add 1 tablespoon buttermilk and mix briefly. The batter should be vividly red and smooth.
- Combine dry ingredients — In a separate bowl, whisk together 1¼ cups flour, 2 tablespoons cocoa powder, ½ teaspoon baking soda, and ¼ teaspoon salt. Gradually add the dry ingredients to the wet mixture, mixing on low just until no streaks of flour remain. Do not overmix or the cookies will be tough.
- Chill the dough — Cover the dough with plastic wrap and refrigerate for at least 30 minutes. Chilling firms the butter, preventing the cookies from spreading too much during baking and yielding a thicker, softer texture.
- Shape and space — Using a 1.5-tablespoon cookie scoop, drop balls of dough onto the prepared baking sheets, spacing them 2 inches apart. For uniform cookies, roll each ball gently between your palms to smooth the surface.
- Bake to perfection — Bake in the preheated oven for 10 to 12 minutes, until the edges are set and the tops are just slightly cracked. The centers will look soft and puffy; they will continue to set as they cool. Do not overbake or they will lose their signature softness.
- Cool completely — Let the cookies rest on the baking sheet for 5 minutes, then transfer to a wire rack to cool completely before glazing. Cooling fully prevents the glaze from melting into a puddle.
- Make the glaze — While the cookies cool, beat 4 ounces softened cream cheese and 2 tablespoons softened butter in a medium bowl with an electric mixer on medium speed until smooth and creamy, about 1 minute.
- Finish the glaze — Add 1 cup sifted powdered sugar, ½ teaspoon vanilla, and 1 tablespoon milk. Beat on low until combined, then increase to medium and beat until the glaze is smooth and pourable. If too thick, add the second tablespoon of milk, one teaspoon at a time, until it drizzles easily from a spoon.
- Glaze and set — Using a spoon or a piping bag fitted with a small round tip, drizzle the glaze over the completely cooled cookies. Let the glaze set at room temperature for about 15 minutes before serving. The glaze will firm slightly but remain creamy.
Common Mistakes I Made (And How I Fixed Them)
- Skipping the chill — I baked the dough right away once. The cookies spread into thin, flat discs. Now I always chill for the full 30 minutes.
- Overmixing the dry ingredients — I stirred the flour mixture too vigorously, and the cookies came out dense and tough. Gentle folding is the fix.
- Using cold cream cheese — I tried glazing with cream cheese straight from the fridge, and the glaze turned lumpy. Letting it come to room temperature solved everything.
- Glazing warm cookies — I drizzled the glaze while the cookies were still a bit warm, and it slid right off into a puddle. Waiting until they are fully cool makes the glaze stay put.
- Measuring flour incorrectly — I scooped the flour with the measuring cup, packing it down. The cookies turned out dry. Now I spoon it into the cup and level it off.
- Overbaking by two minutes — I left the cookies in for 13 minutes thinking they needed more color. They lost their soft, tender center. The 10-12 minute window is strict.
Best Tips for Pioneer Woman Red Velvet Cookies Success
- Chill the dough thoroughly — At least 30 minutes in the fridge. This solidifies the butter so the cookies hold their shape and stay thick.
- Use gel food coloring for vibrant red — Liquid coloring works, but gel gives a deeper hue without adding extra moisture that could affect the dough.
- Measure flour by spooning and leveling — Dip the cup into the flour, then level with a knife. This prevents packing and ensures the right ratio.
- Let the cookies cool completely before glazing — Any residual heat will melt the cream cheese glaze into a sticky mess. Patience here pays off.
- Adjust glaze consistency with milk gradually — Start with 1 tablespoon, then add more teaspoon by teaspoon until it drizzles easily. Too thin will run off the cookies.
- Roll dough balls for even baking — Smooth, uniform balls bake more consistently and look prettier. A quick roll between your palms does the trick.
- Store glazed cookies in a single layer — The glaze stays creamy and doesn’t stick to parchment if you keep them separated. Stack only after the glaze has fully set.
Best Ingredient Swaps for Pioneer Woman Red Velvet Cookies
- Buttermilk substitute — If you don’t have buttermilk, mix 1 tablespoon milk with ½ teaspoon white vinegar and let it stand for 5 minutes. It works perfectly.
- Gel food coloring — Replace the 1 tablespoon liquid coloring with 1 teaspoon gel. The color is more intense and the dough stays thicker.
- Gluten-free flour — Use a 1:1 gluten-free baking blend in place of all-purpose flour. The texture will be slightly more tender but still delicious.
- Dutch-process cocoa — If you only have Dutch-process cocoa, it will work, but the color will be darker and the chocolate flavor slightly less sharp.
- Light cream cheese — Neufchâtel or reduced-fat cream cheese can replace full-fat, but the glaze will be less rich and may set slightly softer.
- Coconut oil for butter — In the cookie dough, you can substitute softened coconut oil for butter. The cookies will have a subtle coconut flavor and a slightly different crumb.
Delicious Variations to Try
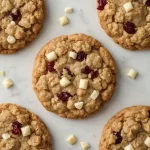
- Chocolate chip red velvet — Fold ½ cup white chocolate chips into the dough before chilling. The sweet chips contrast the tangy glaze beautifully.
- Nutty crunch — Add ¼ cup finely chopped pecans or walnuts to the dough. They add a pleasant crunch against the soft cookie.
- Spiced red velvet — Stir in ½ teaspoon cinnamon and a pinch of nutmeg with the dry ingredients. This gives a warm, holiday-inspired flavor.
- Mint glaze variation — Swap the vanilla in the glaze for ¼ teaspoon peppermint extract. The mint pairs surprisingly well with the cocoa and cream cheese.
- Sandwich cookies — Skip the drizzle and spread a thicker layer of cream cheese glaze between two cookies for a handheld dessert.
- Gluten-free adaptation — Use a 1:1 gluten-free baking blend and add ½ teaspoon xanthan gum if the blend doesn’t contain it. The cookies will be slightly more delicate.
How to Store Leftovers Properly
- Room temperature in an airtight container — Store glazed cookies in a single layer, separated by parchment, for up to 2 days. The glaze stays creamy.
- Refrigerator for longer storage — Place cookies in a sealed container with parchment between layers. They keep for up to 5 days. Let them come to room temperature before serving for the best texture.
- Freezer for up to 3 months — Freeze unglazed cookies in a single layer on a baking sheet, then transfer to a freezer bag. Thaw at room temperature and glaze before serving.
- Glaze storage separately — If you plan to freeze, make the glaze fresh. The cream cheese glaze does not freeze well and can become grainy.
How to Reheat Pioneer Woman Red Velvet Cookies
Reheat gently to restore the soft, fresh-from-the-oven texture without melting the glaze. These methods work best for cookies that have been stored.
- Oven method — Place cookies on a baking sheet in a 300°F (150°C) oven for 5 minutes. They will warm through without crisping too much. Perfect for glazed cookies.
- Microwave method — Heat one cookie on a microwave-safe plate for 10-15 seconds. The cookie will become very soft and the glaze slightly warm. Best for a quick treat.
- Air fryer method — Set the air fryer to 300°F (150°C) and heat cookies for 3-4 minutes. The edges stay soft, and the center remains tender.
- No reheating needed — These cookies are delicious at room temperature. Simply let them sit out for 20 minutes after refrigeration to bring back their softness.
Nutritional Breakdown (Per Serving)
Serving size: 1 cookie (based on 4 servings total). The full batch makes 4 large cookies or 8 smaller ones.
- Calories: 841
- Protein: 8g
- Fat: 41g
- Saturated fat: not listed
- Carbohydrates: 112g
- Fiber: 2g
- Sugar: about 80g
- Sodium: around 350mg
Note: Nutrition values are approximate and may vary based on ingredient brands and portion sizes.
FAQs
Can I make these cookies without red food coloring?
Yes, but the cookies will be brown instead of red. The flavor remains the same. You can leave out the coloring entirely or use beet powder for a natural tint.
Why did my Pioneer Woman Red Velvet Cookies spread too much?
The dough likely wasn’t chilled long enough. Refrigerate for the full 30 minutes at least. Also, make sure your butter is softened, not melted.
Can I freeze Pioneer Woman Red Velvet Cookies?
Absolutely. Freeze the unglazed baked cookies in an airtight container for up to 3 months. Thaw at room temperature, then glaze fresh for the best taste and texture.
Can I use a different type of glaze?
Sure. A simple powdered sugar glaze made with milk and vanilla works, or try a cream cheese frosting spread thickly. The tangy cream cheese glaze is the classic choice.
How do I make the cookies less sweet?
Reduce the sugar in the dough to ¾ cup. The glaze will still add sweetness, so the overall dessert will be more balanced.
Can I double the recipe?
Yes. Simply double all ingredients and bake in batches. The chilling time remains the same. Just be sure your mixer bowl can handle the larger volume.
Final Words
These Pioneer Woman Red Velvet Cookies deliver all the charm of red velvet cake in a soft, portable cookie. The cream cheese glaze is the perfect finishing touch. I hope you give them a try — they are easier than they look and always impress.
Pioneer Woman Red Velvet Cookies
These soft-baked red velvet cookies are rich, buttery, and studded with a luscious cream cheese glaze. The deep cocoa flavor balances the tangy-sweet icing creating a dessert that is as beautiful as it is delicious.
SAVE THIS RECIPE!
Get this sent to your inbox, plus get new recipes from us every week!
INGREDIENTS
INSTRUCTIONS
-
1
Preheat and prep — Heat the oven to 350°F (177°C). Line two large baking sheets with parchment paper. In a large bowl, beat ½ cup softened butter and 1 cup granulated sugar with an electric mixer on medium-high until light and fluffy, about 2 minutes.
-
2
Add wet ingredients — Add 1 large egg, 1 teaspoon vanilla, and 1 tablespoon red food coloring. Beat on medium until fully combined, scraping the bowl. Add 1 tablespoon buttermilk and mix briefly. The batter should be vividly red and smooth.
-
3
Combine dry ingredients — In a separate bowl, whisk together 1¼ cups flour, 2 tablespoons cocoa powder, ½ teaspoon baking soda, and ¼ teaspoon salt. Gradually add the dry ingredients to the wet mixture, mixing on low just until no streaks of flour remain. Do not overmix or the cookies will be tough.
-
4
Chill the dough — Cover the dough with plastic wrap and refrigerate for at least 30 minutes. Chilling firms the butter, preventing the cookies from spreading too much during baking and yielding a thicker, softer texture.
-
5
Shape and space — Using a 1.5-tablespoon cookie scoop, drop balls of dough onto the prepared baking sheets, spacing them 2 inches apart. For uniform cookies, roll each ball gently between your palms to smooth the surface.
-
6
Bake to perfection — Bake in the preheated oven for 10 to 12 minutes, until the edges are set and the tops are just slightly cracked. The centers will look soft and puffy; they will continue to set as they cool. Do not overbake or they will lose their signature softness.
-
7
Cool completely — Let the cookies rest on the baking sheet for 5 minutes, then transfer to a wire rack to cool completely before glazing. Cooling fully prevents the glaze from melting into a puddle.
-
8
Make the glaze — While the cookies cool, beat 4 ounces softened cream cheese and 2 tablespoons softened butter in a medium bowl with an electric mixer on medium speed until smooth and creamy, about 1 minute.
-
9
Finish the glaze — Add 1 cup sifted powdered sugar, ½ teaspoon vanilla, and 1 tablespoon milk. Beat on low until combined, then increase to medium and beat until the glaze is smooth and pourable. If too thick, add the second tablespoon of milk, one teaspoon at a time, until it drizzles easily from a spoon.
-
10
Glaze and set — Using a spoon or a piping bag fitted with a small round tip, drizzle the glaze over the completely cooled cookies. Let the glaze set at room temperature for about 15 minutes before serving. The glaze will firm slightly but remain creamy.
NUTRITION
Calories: 841kcal | Carbohydrates: 112g | Protein: 8g | Fat: 41g | Sodium: 350mg | Fiber: 2g | Sugar: 80g
Nutrition information is automatically calculated, so should only be used as an approximation.