Pioneer Woman No Peek Chicken Recipe
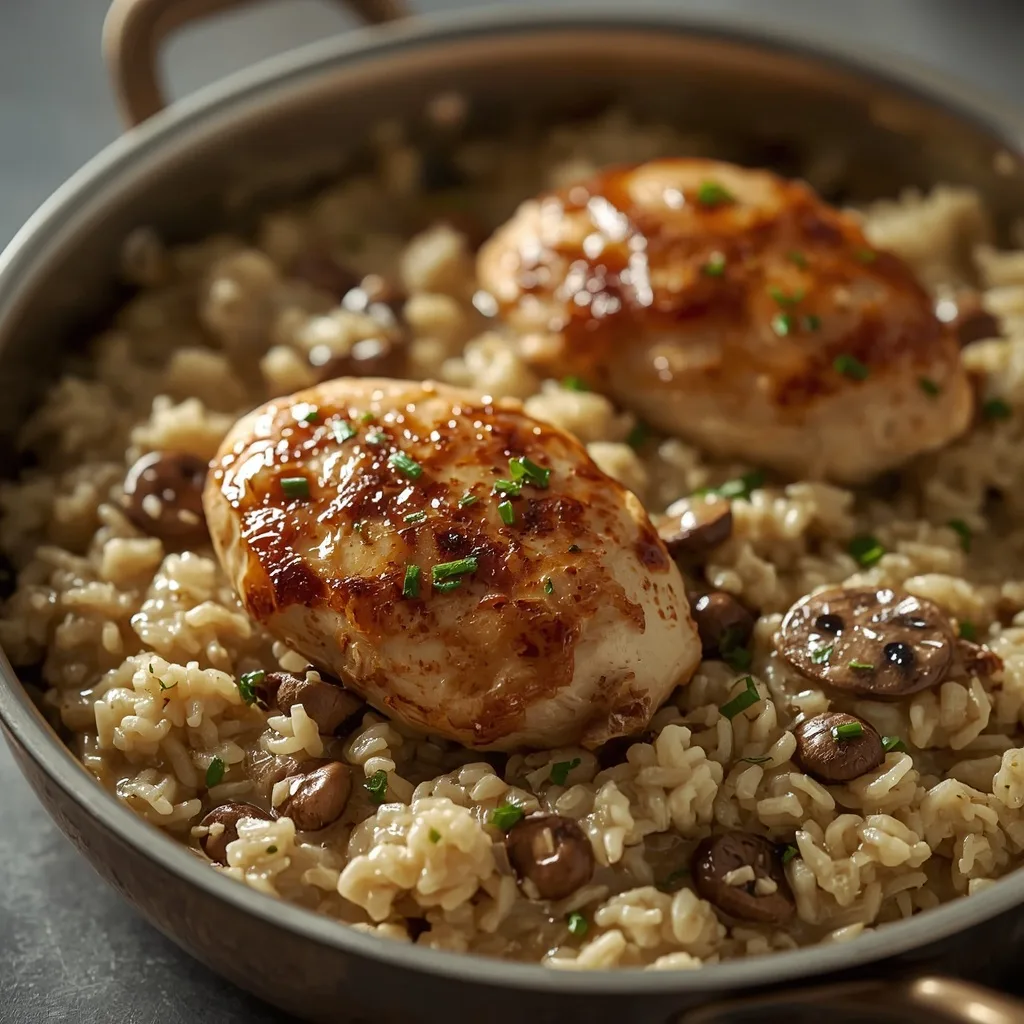
If you need a dinner that practically cooks itself, Pioneer Woman No Peek Chicken is exactly what you’re looking for. Tender chicken breasts bake on a bed of creamy rice infused with mushroom and French onion flavors, creating a rich, saucy one-dish meal.
It’s perfect for busy weeknights or Sunday suppers when you want to set it and forget it. The total time from prep to table is about 70 minutes, and the oven does most of the work. This American comfort classic relies on pantry staples and a hands-off baking method that delivers every time.
What are Pioneer Woman No Peek Chicken?
It’s a simple casserole where raw rice, a creamy soup mixture, and seasoned chicken bake together in one dish. The name comes from the rule: do not lift the lid while it bakes. The trapped steam cooks the rice perfectly and keeps the chicken incredibly moist. The result is fluffy, savory rice with a silky texture and tender, juicy chicken on top, all infused with that deep onion-mushroom flavor.
Why You’ll Love This Recipe
- Minimal prep work — You only need 10 minutes to whisk the sauce, spread the rice, and arrange the chicken. After that, the oven does everything.
- One-dish convenience — Everything bakes in a single 9×13-inch dish, which means fewer dishes to wash and an easy table-to-plate serving.
- Budget-friendly ingredients — Cream of mushroom soup, dry onion soup mix, and long-grain white rice are inexpensive staples you probably already have.
- Naturally gluten-free adaptable — Use a gluten-free cream of mushroom soup and verify your onion soup mix, and the whole dish works for gluten-free diets.
- Customizable protein — Swap chicken breasts for thighs, bone-in cuts, or even boneless pork chops with the same technique.
Essential Ingredients for Pioneer Woman No Peek Chicken
Each ingredient has a specific job here, and sticking to the measurements ensures the rice absorbs just the right amount of liquid.
The Chicken
- 4 boneless, skinless chicken breasts (6 to 8 oz each), trimmed — The even thickness helps them cook at the same rate. If the breasts are very large, slice them in half horizontally to ensure they reach 165°F without drying out.
The Sauce Base
- 1 (10.5 oz) can condensed cream of mushroom soup — This gives the rice its creamy richness. Look for a brand with no MSG if you prefer. Reduced-fat versions work, but the sauce will be slightly thinner.
- 1 (1 oz) envelope dry onion soup mix — Lipton is the classic choice. It adds deep savory flavor with tiny dried onions that soften as they bake.
- 1 1/2 cups water (or low-sodium chicken broth) — Water keeps it simple, but chicken broth adds extra depth. Do not use more than 1 1/2 cups, or the rice will turn mushy.
The Rice
- 1 cup uncooked long-grain white rice — Long-grain rice stays separate and fluffy. Do not substitute instant or parboiled rice — the liquid ratio is designed for regular long-grain.
Finishing Touches
- 2 tablespoons unsalted butter, cut into small pieces — The butter dots on top of the chicken melt into the rice, adding richness and helping the chicken stay moist.
- Kosher salt and freshly ground black pepper — The onion soup mix is salty, so go light on the salt. A few grinds of pepper on each breast is enough.
- Chopped fresh parsley for garnish (optional) — A sprinkle of fresh green adds color and a mild, fresh contrast to the rich dish.
Equipment You’ll Need
- A 9×13-inch baking dish — Any material works (glass, ceramic, metal), but make sure it has a tight-fitting lid or you can seal it well with foil.
- Heavy-duty aluminum foil — If your dish has no lid, use a double layer of heavy-duty foil. Regular foil may tear or not seal well enough to trap steam.
- Medium mixing bowl and whisk — Whisk the soup, soup mix, and water until completely smooth. A whisk breaks up any lumps faster than a fork.
- Instant-read thermometer — The easiest way to check that the chicken has reached 165°F without lifting the foil too early. You can slide it under the edge once baking is done.
- Cutting board and sharp knife — For trimming excess fat from the chicken and chopping parsley.
Instructions to Make Pioneer Woman No Peek Chicken
Follow these steps closely, especially the rule about not peeking. The steam is what cooks the rice perfectly.
- Preheat and prep the dish — Set the oven to 350°F. Lightly grease a 9×13-inch baking dish with butter or nonstick spray so the rice won’t stick.
- Mix the liquid base — In a medium bowl, whisk the cream of mushroom soup, dry onion soup mix, and water until smooth. It will look thin, but that’s normal — the rice will absorb it during baking.
- Add the rice and liquid — Spread the uncooked rice evenly across the bottom of the dish. Pour the soup mixture over it and stir gently so every grain is submerged.
- Season and arrange the chicken — Pat the chicken dry, then season both sides with a pinch of salt and a few grinds of black pepper. Place the breasts on top of the rice in a single layer, spacing them slightly apart.
- Dot with butter — Scatter the small butter pieces over the chicken. This adds flavor and helps keep the meat tender.
- Seal tightly and bake — Cover the dish with a tight lid or two layers of heavy-duty foil, pressing down around the edges. Bake for 55 to 60 minutes. Do not lift the cover during baking.
- Rest before serving — Remove the dish from the oven and let it rest, still covered, for 5 to 10 minutes. This lets the rice absorb any remaining liquid and the chicken juices redistribute.
- Check and serve — Carefully uncover (steam will escape). If the rice looks slightly wet, fluff it with a fork and let it sit uncovered for 2 to 3 minutes. Garnish with parsley and serve right from the dish.

Common Mistakes I Made (And How I Fixed Them)
- Lifting the foil early — I peeked at 30 minutes and the rice came out crunchy. The trapped steam is essential; trust the full 55 minutes before you look.
- Using too much liquid — I once thought extra water would make the rice more tender. Instead it turned the rice mushy and soupy. Stick to 1 1/2 cups exactly.
- Overcrowding the chicken — I tried to squeeze six small breasts close together, which caused uneven cooking. Spacing them apart allows hot air to circulate and they cook more evenly.
- Skipping the rest time — I served immediately after baking, and the rice was slightly wet. Letting it rest covered for 5 minutes made a huge difference — the rice absorbed the extra liquid perfectly.
- Not trimming excess fat — I left a thick fat strip on one breast, which rendered during baking and made the rice greasy. Trim that fat off before seasoning.
Best Tips for Pioneer Woman No Peek Chicken Success
- Use a tight seal — Press the foil down around the edges of the dish so no steam escapes. If using a lid, make sure it fits snugly. A loose seal leads to undercooked rice.
- Cut chicken to uniform thickness — Thicker parts will cook slower. Pound the thickest end of each breast to about 1/2 inch even thickness for consistent doneness.
- Fluff the rice gently — After resting, use a fork to separate the grains rather than stirring with a spoon. Stirring can crush the rice into a paste.
- Add a splash of Worcestershire — A teaspoon stirred into the soup mixture adds an extra layer of umami that complements the onion flavor beautifully.
- Keep leftovers moist — Store the chicken and rice together in the same container so the rice doesn’t dry out. The chicken’s residual moisture keeps everything tender.
- Don’t skip the butter — Even if you’re watching fat, the two tablespoons of butter are vital for keeping the lean chicken breast from drying out during the long bake.
- Test the rice, not just the chicken — The chicken may register 165°F but the rice might still need a few more minutes. If the rice is still firm, cover and bake another 5 to 10 minutes before resting.
Best Ingredient Swaps for Pioneer Woman No Peek Chicken
- Chicken broth instead of water — Replace the 1 1/2 cups of water with low-sodium chicken broth for a richer, more savory base. It’s the easiest upgrade you can make.
- Cream of celery or chicken soup — If you’re not a fan of mushroom, use condensed cream of chicken or cream of celery soup. The flavor changes slightly but the texture stays the same.
- Bone-in chicken thighs — For even juicier meat, use 4 to 6 bone-in, skin-on thighs. Increase bake time by 10 to 15 minutes and check that they reach 175°F near the bone.
- Brown rice instead of white — Use 1 cup of long-grain brown rice, but increase the water to 2 cups and bake for about 70 to 75 minutes. The dish will have a nuttier flavor and chewier texture.
- Garlic and herb seasoning — Swap the dry onion soup mix with a packet of dry ranch dressing mix for a tangy, herby twist. Reduce salt slightly since ranch mix is salty too.
Delicious Variations to Try
- Cheesy No Peek Chicken — Sprinkle 1 cup of shredded cheddar or Monterey Jack over the rice before layering the chicken. The cheese melts into the sauce for an extra creamy dish.
- Spicy Southwest version — Add 1/2 cup drained canned corn and 1/4 cup diced green chiles to the rice mixture. Use cream of chicken soup and a pinch of cumin for a Tex-Mex flair.
- Vegetable-loaded variation — Stir 1 cup of frozen peas and carrots into the rice before baking. They cook right along with the rice and add color and nutrition.
- Lemon herb twist — Add the zest of one lemon and 2 teaspoons of dried thyme to the soup mixture. Squeeze a little lemon juice over the chicken before covering for a bright, fresh note.
- Creamy broccoli version — Layer 2 cups of small broccoli florets on top of the rice before placing the chicken. Broccoli steams perfectly under the foil and turns tender without getting mushy.
How to Store Leftovers Properly
- Refrigerator storage — Place cooled leftovers in an airtight container with the chicken and rice together. It stays fresh for up to 4 days. Keep the lid on to prevent the rice from drying out.
- Freezer storage — Transfer the fully cooked dish to a freezer-safe container or zip-top bag. Press out as much air as possible and freeze for up to 3 months. Thaw overnight in the refrigerator before reheating.
- Portioning for convenience — Divide the chicken and rice into individual servings before freezing. That way you can grab one portion at a time and reheat it without thawing the whole batch.
How to Reheat Pioneer Woman No Peek Chicken
Reheating gently is key so the chicken stays moist and the rice doesn’t dry out. Here are the best methods.
- Oven method (best for texture) — Preheat to 325°F. Place leftovers in an oven-safe dish, cover with foil, and heat for 15 to 20 minutes. The low heat preserves moisture.
- Microwave method (fast) — Place a single serving on a microwave-safe plate, cover with a damp paper towel, and microwave on 70% power for 2 to 3 minutes. The damp towel adds steam.
- Stovetop method (even heating) — Transfer the chicken and rice to a nonstick skillet with a splash of water or broth. Cover and warm over medium-low heat, stirring the rice occasionally, for about 5 minutes.
Nutritional Breakdown (Per Serving)
Each serving is one chicken breast plus about 3/4 cup of the creamy rice. Values are based on the recipe as written.
- Calories: 410
- Protein: 40g
- Fat: 8g
- Carbohydrates: 40g
- Fiber: 1g
- Sugar: 2g
- Sodium: about 675mg
FAQs
Can I use instant rice for Pioneer Woman No Peek Chicken?
No, I don’t recommend it. Instant rice has a different liquid-to-rice ratio and will turn mushy or burn. Stick with uncooked long-grain white rice for the best texture.
Do I have to cover the dish tightly?
Yes, absolutely. The steam trapped under the foil or lid is what cooks the rice. A loose cover lets steam escape, and you’ll end up with crunchy, undercooked rice.
Can I add vegetables to Pioneer Woman No Peek Chicken?
Absolutely. Fold up to 1 1/2 cups of raw vegetables like broccoli florets, sliced carrots, or frozen peas into the rice before baking. They will steam and become tender.
Why did my rice turn out mushy?
Most likely you added too much liquid or used a different type of rice. Double-check that your water measurement is exactly 1 1/2 cups and that you’re using long-grain white rice.
How do I know when the chicken is fully cooked?
Use an instant-read thermometer inserted into the thickest part of a breast. It should read 165°F. The rice should also be tender — if it’s still firm, cover and bake a few more minutes.
Can I double Pioneer Woman No Peek Chicken for a crowd?
Yes. Double all ingredients and use a larger dish (about 10×15 inches) or two 9×13 dishes. Bake time may increase by 10 to 15 minutes. Check the chicken temp and rice tenderness before serving.
Try These Recipes
Final Words
This Pioneer Woman No Peek Chicken has become one of my most-used dinner strategies for busy nights. The creamy rice and tender chicken come together with almost no hands-on time, and the flavor is comforting and hearty. Give it a try — just remember to keep that lid on until the timer beeps.
Pioneer Woman No Peek Chicken
A classic one-dish comfort meal featuring tender, juicy chicken breasts baked on a bed of creamy rice infused with mushroom and French onion flavors. The simple, hands-off method produces a rich, saucy rice that perfectly complements the chicken.
SAVE THIS RECIPE!
Get this sent to your inbox, plus get new recipes from us every week!
INGREDIENTS
INSTRUCTIONS
-
1
Preheat the oven to 350°F (177°C). Lightly grease a 9×13-inch baking dish with butter or nonstick spray. This ensures the rice does not stick and makes cleanup easier.
-
2
In a medium bowl, whisk together the cream of mushroom soup, dry onion soup mix, and water until smooth. The mixture will be thin but will thicken during baking as the rice absorbs liquid.
-
3
Spread the uncooked rice evenly across the bottom of the prepared baking dish. Pour the soup mixture over the rice and stir gently to combine, making sure all grains are submerged.
-
4
Season the chicken breasts on both sides with a pinch of kosher salt and a few grinds of black pepper. Place them directly on top of the rice mixture in a single layer, spaced slightly apart so they cook evenly.
-
5
Dot the chicken breasts with the small pieces of butter. The butter adds richness and helps keep the chicken moist while it bakes.
-
6
Cover the dish tightly with a lid or heavy-duty aluminum foil. If using foil, press it down around the edges to create a near-airtight seal. This is essential to trap steam and cook the rice without peeking.
-
7
Place the dish in the preheated oven and bake for 55 to 60 minutes, until the rice is tender and the chicken registers 165°F (74°C) at the thickest part. Do not lift the cover during baking — the steam created is what cooks the rice perfectly.
-
8
Remove the dish from the oven and let it rest, still covered, for 5 to 10 minutes. This resting period allows the rice to absorb any remaining liquid and the chicken juices to redistribute.
-
9
Carefully uncover the dish — steam will escape. Check that the rice is fully cooked and fluffy; if it appears slightly wet, fluff it with a fork and let sit uncovered for 2 to 3 more minutes.
-
10
Garnish with chopped fresh parsley if desired and serve directly from the baking dish. Spoon the creamy rice onto plates and top with a chicken breast.
NOTES
- For extra flavor, substitute chicken broth for water. Use bone-in, skin-on chicken breasts for even more juiciness, but increase bake time by 10 to 15 minutes. Leftover chicken and rice can be stored in an airtight container in the refrigerator for up to 4 days. Reheat individual portions in the microwave on 70% power for 2 to 3 minutes, or reheat the whole casserole covered at 325°F (163°C) for 15 to 20 minutes. Freeze the fully cooked dish for up to 3 months; thaw overnight in the fridge before reheating.
NUTRITION
Serving: 1 | Calories: 410kcal | Carbohydrates: 40g | Protein: 40g | Fat: 8g | Saturated Fat: 3g | Cholesterol: 130mg | Sodium: 675mg | Fiber: 1g | Sugar: 2g
Nutrition information is automatically calculated, so should only be used as an approximation.