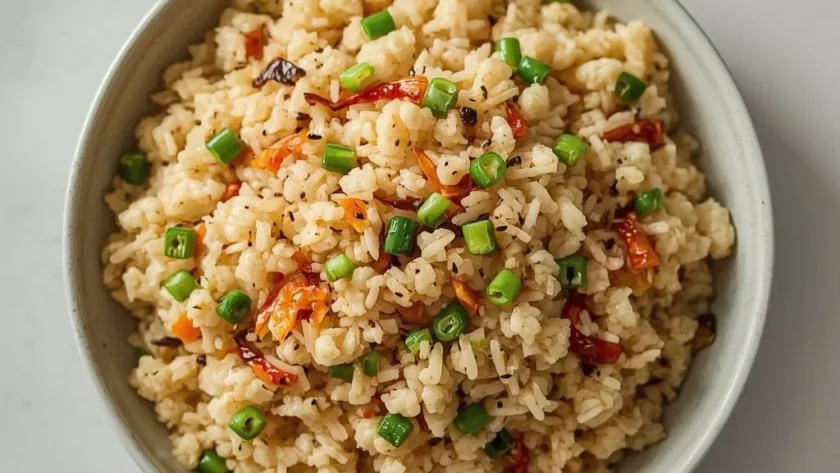
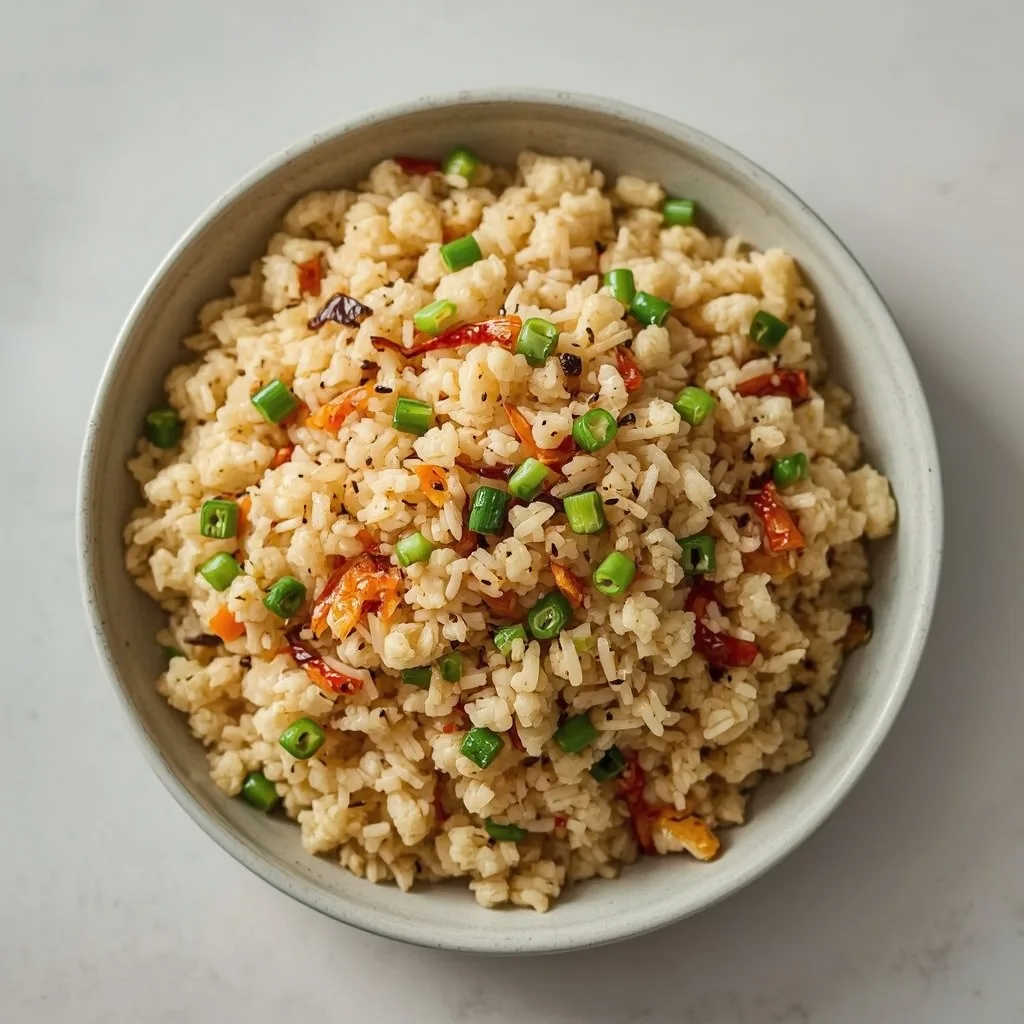
Pioneer Woman Cauliflower Fried Rice Recipe
Pioneer Woman Cauliflower Fried Rice delivers all the savory satisfaction of takeout fried rice with a fraction of the carbs. The riced cauliflower soaks up soy sauce, sesame oil, and scrambled eggs in a way that feels indulgent but keeps things light. One bite and you will not miss the grains.
This dish works perfectly for busy weeknights when you want something fast — the total time clocks in at just 30 minutes. It also holds its own as a meal prep option for the week ahead. The stovetop method uses a single skillet, so cleanup stays minimal while the flavors build in layers.
What is Pioneer Woman Cauliflower Fried Rice?
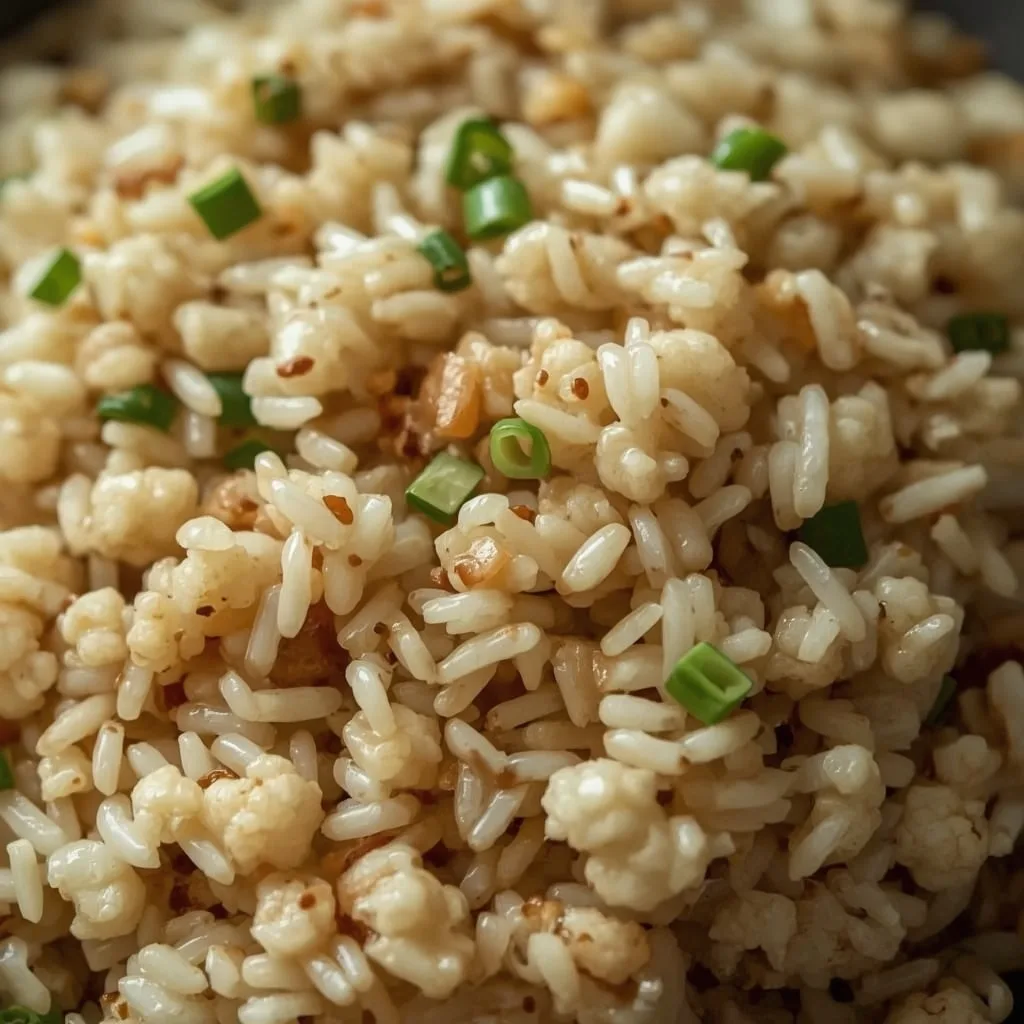
This is a low-carb version of classic Chinese fried rice that swaps white rice for finely chopped cauliflower. The cauliflower gets pulsed in a food processor until it looks just like rice grains, then stir-fried with onion, garlic, ginger, peas, carrots, and scrambled eggs. The result has the same fluffy texture and savory umami punch you expect from the original, but the cauliflower adds a subtle sweetness and keeps everything surprisingly light.
Why You’ll Love This Recipe
Here is what makes this one worth adding to your regular rotation.
- Quick cook time — From start to finish, you need only 30 minutes. The active stir-frying takes even less than that.
- One-pan cleanup — Everything happens in a single 12-inch skillet or wok. No piles of pots and pans waiting at the sink.
- Low-carb without sacrifice — The cauliflower mimics rice so closely that even grain lovers at my table went back for seconds. You get the full flavor with about 15 grams of carbs per serving.
- Customizable protein options — Add cooked chicken, shrimp, or tofu right at the end for a heartier meal. The base recipe stays flexible.
- Great for meal prep — Leftovers keep for up to three days and reheat beautifully in a hot skillet. Make a double batch on Sunday and eat well all week.
Essential Ingredients for Pioneer Woman Cauliflower Fried Rice
You need exactly 11 ingredients, and most of them are pantry staples. Here is what each one does.
For the Cauliflower Base
- 1 large head cauliflower (about 2 lb), cut into florets — Fresh cauliflower riced at home gives the best texture. Pre-riced bags tend to hold too much moisture and turn mushy.
- 1 tbsp olive oil — This provides the main cooking fat with a neutral flavor that lets the other ingredients shine.
- 1 tbsp toasted sesame oil — Toasted sesame oil brings that unmistakable nutty aroma. Do not skip it — it is what makes the dish taste like real fried rice.
The Aromatics and Vegetables
- 1 medium onion, finely diced — A fine dice helps the onion soften quickly and blend into the cauliflower without leaving big chunks.
- 2 cloves garlic, minced — Fresh garlic adds sharpness that mellows as it cooks. Stick with fresh — powdered garlic will not give the same depth.
- 1 tbsp fresh ginger, grated — Grated ginger releases its oils fast and infuses the entire pan. A microplane works best here.
- 1 cup frozen peas and carrots, thawed — The classic fried rice mix. Thaw them first so excess moisture does not steam the cauliflower.
The Protein and Seasonings
- 2 large eggs, lightly beaten — The eggs scramble into soft curds that add richness and protein. Beat them just before adding them to the pan.
- 3 tbsp low-sodium soy sauce — Low-sodium gives you control over the salt level. You can always add more at the table if needed.
- 1/4 tsp white pepper — White pepper has a milder, more floral heat than black pepper. It blends into the dish without leaving dark specks.
- 2 green onions, sliced (for garnish) — Sliced green onions add a fresh, sharp finish right before serving. They also give the dish a pop of color.
Equipment You’ll Need
You do not need much to make this work. Here is what the recipe calls for.
- Food processor — This is the fastest way to rice cauliflower. Use short pulses — 8 to 10 one-second bursts per batch — and stop before the florets turn to mush.
- 12-inch nonstick skillet or wok — The wide surface area lets the cauliflower spread out and brown instead of steam. Nonstick makes the scrambled eggs easy to clean up.
- Wide spatula — A wide, flat spatula helps you fold and stir the cauliflower without crushing it. A rubber spatula works for the eggs but not for the heavy cauliflower mixture.
- Cutting board and sharp knife — You need these for dicing the onion, mincing the garlic, and slicing the green onions. A sharp knife makes the prep go much faster.
- Microplane or fine grater — Fresh ginger grates best on a microplane. A box grater works too, but the microplane gives a finer, more even result.
Instructions to Make Pioneer Woman Cauliflower Fried Rice
Follow these steps closely for the best results. The order matters — do not skip or rearrange.
- Rice the cauliflower — Working in two batches, pulse florets in a food processor 8 to 10 times per batch until they look like rice grains. Do not overprocess. You should have about 4 cups total. Set aside in a large bowl.
- Heat the oils — Place your skillet or wok over medium-high heat. Add the olive oil and toasted sesame oil, swirling to coat the pan. Wait until the oil shimmers and a drop of water sizzles on contact — about 30 seconds.
- Cook the onion — Add the diced onion and cook, stirring frequently, until translucent, about 2 to 3 minutes. The onion should soften without browning. If it browns, turn the heat down.
- Add garlic and ginger — Stir in the minced garlic and grated ginger. Cook for 30 seconds, stirring constantly, until fragrant. Burnt garlic turns bitter, so keep moving it around the pan.
- Add peas and carrots — Tip in the thawed peas and carrots. Cook for 1 to 2 minutes, stirring, until heated through and any extra moisture has evaporated. This step prevents a watery final dish.
- Scramble the eggs — Push the vegetables to one side of the pan. Pour the beaten eggs into the empty space and let them set for 15 seconds. Scramble with a spatula until just cooked but still soft, about 45 seconds total, then stir into the vegetables.
- Add the cauliflower — Add the riced cauliflower to the skillet. Fold and stir everything together with a wide spatula until the cauliflower is coated. Spread it in an even layer and let it cook undisturbed for 2 minutes to develop light browning.
- Cook until tender — After 2 minutes, stir the cauliflower again. Continue cooking for another 2 to 3 minutes, stirring occasionally, until the cauliflower is tender but still has a slight crunch. Overcooking makes it soggy.
- Season and serve — Drizzle the soy sauce over the cauliflower and sprinkle with white pepper. Stir vigorously for about 30 seconds to distribute the sauce evenly. Taste before adding extra salt — the soy sauce is already salty. Remove from heat, garnish with sliced green onions, and serve immediately.
Common Mistakes I Made (And How I Fixed Them)
A few things tripped me up the first time. Here is what went wrong and how I corrected it.
- Overprocessing the cauliflower — I pulsed too long and ended up with mushy cauliflower that turned to paste in the pan. Now I stick to 8 to 10 one-second pulses per batch and stop while it still looks like small grains.
- Soggy texture from wet cauliflower — Fresh cauliflower holds a lot of water, and I did not pat it dry after ricing. Now I spread the riced cauliflower on a clean kitchen towel for a few minutes to absorb excess moisture before cooking.
- Not heating the pan enough — I added the cauliflower to a barely warm skillet, and it steamed instead of browned. Now I wait until the oil shimmers and a water drop sizzles before adding anything.
- Skipping the undisturbed cook time — I stirred constantly out of habit and never got any browning. Letting the cauliflower sit for 2 full minutes without stirring gives it that light golden color and nutty flavor.
- Adding salt too early — I seasoned with salt before tasting and ended up with an overly salty dish. The soy sauce provides plenty of sodium, so now I wait until the end and add salt only if needed.
- Using pre-riced cauliflower from a bag — The bags are convenient but hold way more moisture than fresh-riced cauliflower. The texture came out watery every time. Fresh is worth the extra few minutes.
Best Tips for Pioneer Woman Cauliflower Fried Rice Success
These pointers make a real difference in the final dish.
- Pat the cauliflower dry — After ricing, spread the cauliflower on a towel for 2 to 3 minutes. This removes surface moisture and helps it brown instead of steam.
- Work in two batches when ricing — Overcrowding the food processor leads to uneven chopping and some pieces turning to mush. Half the florets at a time gives consistent results.
- Keep the heat at medium-high — Too low and the cauliflower releases water and steams. Too high and the garlic burns before the onion softens. Medium-high hits the sweet spot.
- Thaw frozen vegetables completely — Frozen peas and carrots release water as they cook. Thawing them first and patting them dry prevents excess liquid from pooling in the pan.
- Let the eggs set before scrambling — Pour the beaten eggs into an empty side of the pan and wait 15 seconds before stirring. This creates soft, tender curds rather than dry, scattered bits.
- Taste before adding extra salt — Low-sodium soy sauce still contains plenty of salt. Taste the finished dish first, then add a pinch of kosher salt only if it needs more.
- Serve immediately — The cauliflower continues to soften as it sits. For the best texture with that slight crunch, serve straight from the skillet.
Best Ingredient Swaps for Pioneer Woman Cauliflower Fried Rice
Several ingredients offer room for change without compromising the dish.
- Tamari or coconut aminos for soy sauce — If you need a gluten-free version, swap the soy sauce with tamari or coconut aminos. Coconut aminos are slightly sweeter, so the flavor shifts a bit but still works.
- Avocado oil for olive oil — Avocado oil has a higher smoke point and a neutral taste, making it a solid substitute for the olive oil in the initial sauté.
- Frozen broccoli florets for peas and carrots — Finely chop frozen broccoli and add it in place of the peas and carrots. The broccoli holds up well and adds a slightly earthier flavor.
- Black pepper for white pepper — If you do not have white pepper, use finely ground black pepper instead. The flavor is bolder and you will see dark specks, but it still tastes great.
- Shallots for onion — Finely diced shallots work in place of the onion. They are milder and slightly sweeter, so the garlic and ginger come through more clearly.
Delicious Variations to Try
Once you master the base, try these twists to keep things interesting.
- Spicy Szechuan version — Add 1 teaspoon of chili garlic sauce or sambal oelek along with the soy sauce. The heat pairs beautifully with the sesame oil and ginger.
- Chicken fried rice — Stir in 1 cup of diced cooked chicken along with the peas and carrots. Shredded rotisserie chicken works great and saves time.
- Shrimp fried rice — Add 1 cup of peeled cooked shrimp during the last 2 minutes of cooking. Let the shrimp warm through with the cauliflower before adding the soy sauce.
- Mushroom and bok choy version — Sauté 1 cup of sliced mushrooms with the onion, then add chopped bok choy stems with the peas and carrots. A totally different vegetable profile that still feels like fried rice.
- Kimchi fried rice — Stir in 1/2 cup of chopped kimchi after the eggs are scrambled. The kimchi adds tang, heat, and a fermented depth that transforms the whole dish.
- Vegetarian with tofu — Add 1 cup of diced firm tofu that has been pressed and pan-fried until golden. Toss it in with the peas and carrots for extra protein without meat.
How to Store Leftovers Properly
Leftovers keep well when handled correctly. Here is what to do.
- Airtight container — Transfer the cooled cauliflower fried rice to an airtight container. Press a piece of parchment paper directly onto the surface before sealing to reduce moisture loss.
- Refrigerate for up to 3 days — The dish stays fresh in the fridge for 3 days. Beyond that, the cauliflower softens too much and the flavors start to fade.
- Do not freeze — Cauliflower has a high water content, and freezing ruins its texture. The thawed result will be mushy and watery, so skip the freezer for this one.
- Label with the date — Write the date on the container so you know exactly when you made it. This prevents guessing and wasted food.
How to Reheat Pioneer Woman Cauliflower Fried Rice
Reheating brings the texture back when done right. The stovetop method works best, but here are all the options.
- Stovetop skillet (best method) — Heat a nonstick skillet over medium-high heat. Add the leftovers and cook, stirring occasionally, for 3 to 4 minutes until hot throughout. Add a splash of soy sauce or a drop of sesame oil if the rice looks dry.
- Microwave (fastest method) — Place the leftovers in a microwave-safe bowl and cover with a damp paper towel. Microwave in 30-second bursts, stirring between each, for 1 to 2 minutes total. The damp towel prevents the cauliflower from drying out.
- Air fryer (crispiest method) — Preheat the air fryer to 375°F. Spread the leftovers in the basket in a single layer and cook for 3 to 4 minutes, shaking halfway through. The edges get nicely crisp while the center stays tender.
- Oven (for larger batches) — Preheat the oven to 350°F. Spread the leftovers on a baking sheet in an even layer. Cover with foil and bake for 8 to 10 minutes, then remove the foil and bake 2 more minutes to re-crisp the top.
Nutritional Breakdown (Per Serving)
One serving equals one-quarter of the full recipe, which comes out to roughly 1 heaping cup.
- Calories — 167
- Protein — 8g
- Fat — 10g
- Carbohydrates — about 15g
- Fiber — about 4g
- Sugar — 5g
- Sodium — around 406mg
FAQs
What makes Pioneer Woman Cauliflower Fried Rice different from regular fried rice?
The main difference is the cauliflower replaces the white rice, which drops the carbohydrate count significantly while keeping a similar texture. The cooking method stays the same — high heat, quick stir-frying, and the same savory seasonings — so the flavor profile feels familiar and satisfying.
Can I use frozen cauliflower rice instead of fresh?
You can, but the texture will not be as good. Frozen cauliflower rice holds more water and tends to turn mushy during cooking. If you must use it, thaw it completely and press it dry with a clean kitchen towel before adding it to the skillet.
How do I keep the cauliflower from getting soggy?
Three things matter here. First, pat the riced cauliflower dry before cooking. Second, make sure your skillet is hot enough that the cauliflower sizzles immediately when it hits the pan. Third, do not stir constantly — let it sit undisturbed for 2 minutes to brown instead of steam.
Can I freeze Pioneer Woman Cauliflower Fried Rice?
Freezing is not recommended. The cauliflower releases a lot of water as it thaws, and the texture turns mushy and unappealing. Stick to refrigerating leftovers for up to 3 days and reheat using the stovetop method for the best results.
What protein goes best with this dish?
Cooked chicken, shrimp, and tofu all work well. Add 1 cup of diced cooked protein along with the peas and carrots so it heats through with the cauliflower. Shredded rotisserie chicken is the fastest option for busy nights.
Is Pioneer Woman Cauliflower Fried Rice gluten-free?
The recipe as written is not gluten-free because standard soy sauce contains wheat. To make it gluten-free, swap the soy sauce with tamari or coconut aminos. Everything else in the recipe is naturally gluten-free.
Try These Recipes
Final Words
Pioneer Woman Cauliflower Fried Rice proves that eating low-carb does not mean eating boring. The cauliflower takes on all the flavor of the soy sauce, sesame oil, and scrambled eggs, and the entire dish comes together in a single pan in under 30 minutes. Give it a try the next time a takeout craving hits — you might be surprised at how much you reach for this one.
Pioneer Woman Cauliflower Fried Rice
This light and flavorful cauliflower fried rice is a low-carb twist on the classic takeout staple. Riced cauliflower mimics the texture of traditional rice while soaking up savory soy sauce, sesame oil, and the richness of scrambled eggs. It’s a quick, one-pan meal that delivers all the satisfaction of fried rice without the grains.
SAVE THIS RECIPE!
Get this sent to your inbox, plus get new recipes from us every week!
INGREDIENTS
INSTRUCTIONS
-
1
Working in two batches, pulse the cauliflower florets in a food processor until they resemble grains of rice — about 8 to 10 one-second pulses per batch. Do not overprocess or the cauliflower will become mushy. You should have about 4 cups of riced cauliflower; set aside in a large bowl.
-
2
Heat a 12-inch nonstick skillet or wok over medium-high heat. Add the olive oil and sesame oil and swirl to coat the pan. The oil is ready when it shimmers and a drop of water sizzles on contact — this takes about 30 seconds.
-
3
Add the diced onion to the hot oil and cook, stirring frequently, until the onion softens and turns translucent, about 2 to 3 minutes. The onion should not brown; if it does, the heat is too high.
-
4
Add the minced garlic and grated ginger to the pan. Stir constantly for 30 seconds until fragrant — you will smell the ginger and garlic immediately. Be careful not to let them burn, as burnt garlic turns bitter.
-
5
Add the thawed peas and carrots to the skillet. Cook, stirring, for 1 to 2 minutes until the vegetables are heated through and any excess moisture has evaporated. This step prevents the final dish from becoming watery.
-
6
Push the vegetable mixture to one side of the pan, creating an empty space on the other side. Pour the beaten eggs into the empty space and let them set for about 15 seconds, then scramble them with a spatula, breaking into small curds. Once the eggs are just cooked but still soft, about 45 seconds total, stir them into the vegetables.
-
7
Add the riced cauliflower to the skillet. Use a wide spatula to fold and stir everything together, coating the cauliflower with the oil and vegetable mixture. Spread the cauliflower in an even layer and let it cook undisturbed for 2 minutes to develop light browning on the bottom.
-
8
After 2 minutes, stir the cauliflower again, then continue cooking for another 2 to 3 minutes, stirring occasionally, until the cauliflower is tender but still has a slight crunch. Overcooking will make it soggy.
-
9
Drizzle the soy sauce over the cauliflower and sprinkle with white pepper. Stir vigorously to distribute the sauce evenly, about 30 seconds. Taste and add a pinch of kosher salt only if needed — the soy sauce is already salty.
-
10
Remove the skillet from heat. Garnish with sliced green onions and serve immediately. For a complete meal, consider adding cooked chicken, shrimp, or tofu. Leftovers can be stored in an airtight container in the refrigerator for up to 3 days and reheated in a hot skillet.
NUTRITION
Calories: 167kcal | Carbohydrates: 15g | Protein: 8g | Fat: 10g | Sodium: 406mg | Fiber: 4g | Sugar: 5g
Nutrition information is automatically calculated, so should only be used as an approximation.